
Contents
The process of transferring a domain name in your METUnic control panel to another account that also exists at METUnic is called an “Internal Transfer”.
You can now carry out your Internal Transfer operations through your control panel, without documents!
Steps for the Sending Account / the Account Initiating the Internal Transfer
- Log in to your control panel from the METUnic homepage.
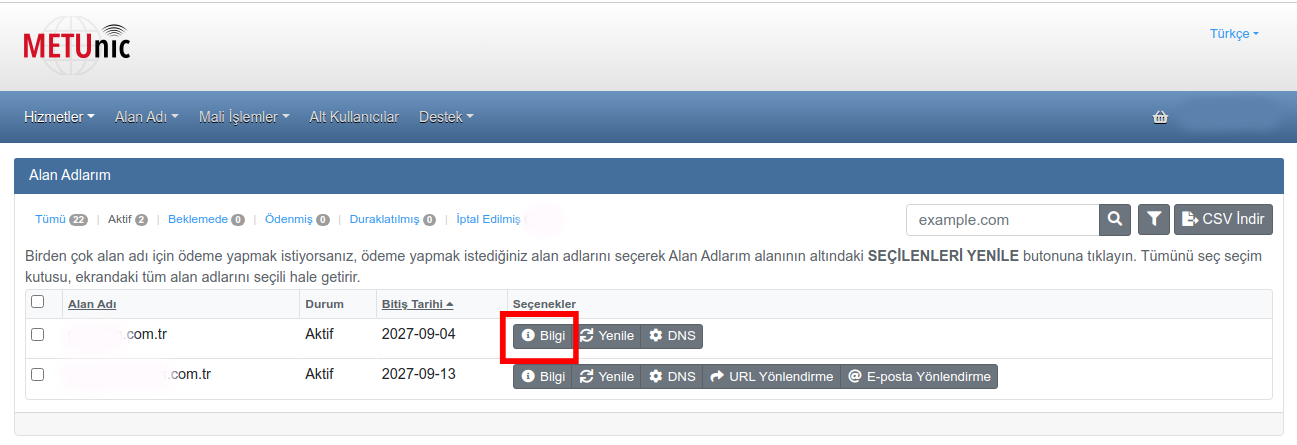
- In the “My Domains” table in your control panel, click the “Info” box next to the domain name you want to internally transfer.
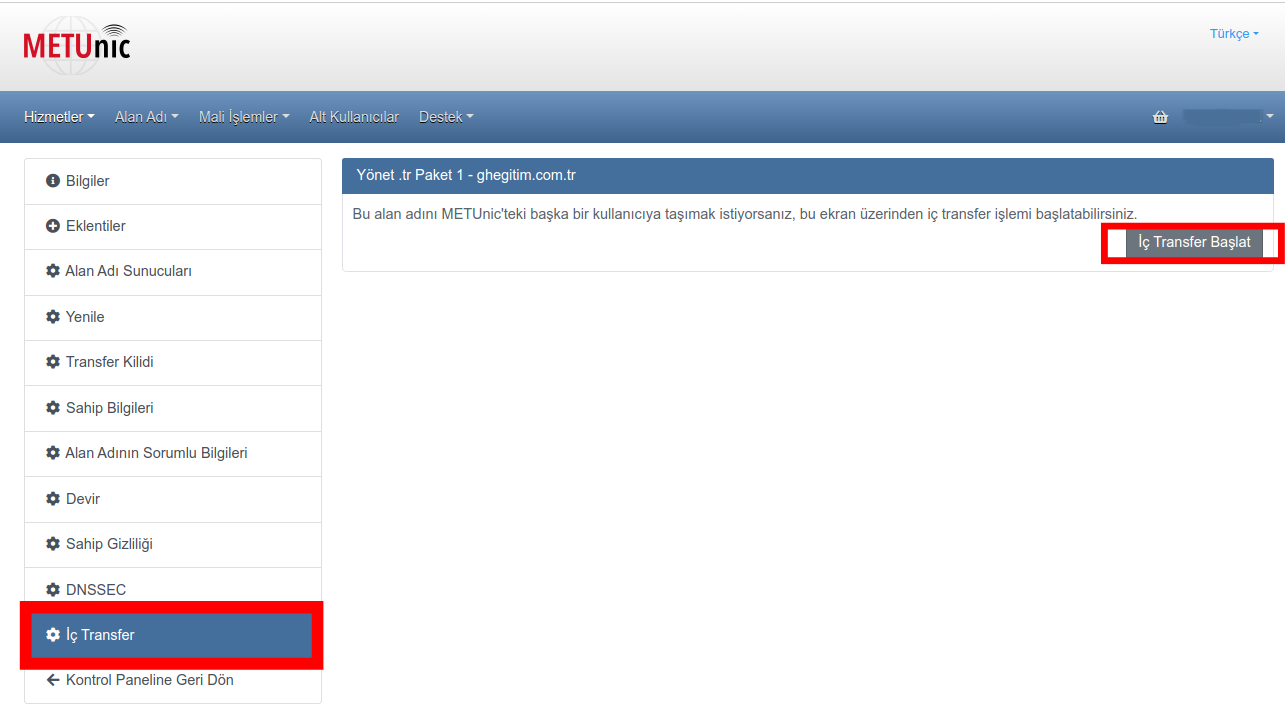
- From the table on the page that opens, select the “Internal Transfer” heading.
- Then click the “Start Internal Transfer” button.
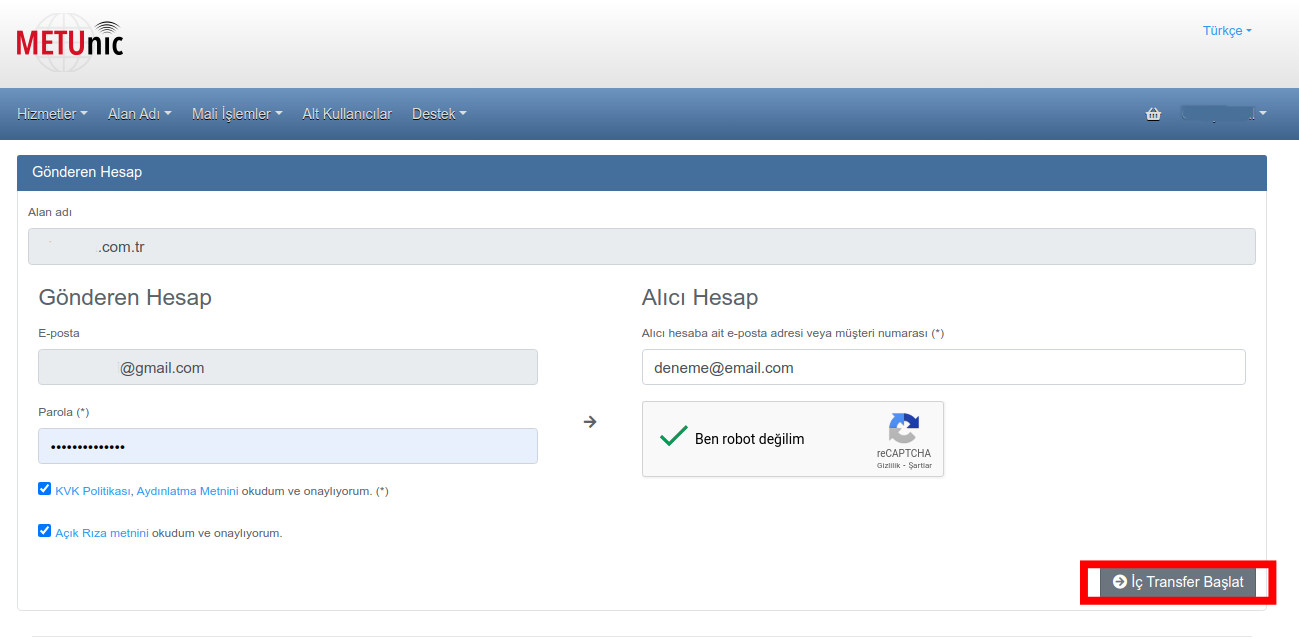
- On this page, enter the details of yourself, the “Sending Account”, and of the account you want to transfer the domain name to, the “Receiving Account”, correctly.
- Fill in the boxes that prove you are not a robot and confirm that you approve the internal transfer.
- After you click the “Start Internal Transfer” button, your transfer will be initiated.
Steps for the Receiving Account / the Account Accepting the Internal Transfer
- Log in to your control panel from the METUnic homepage.
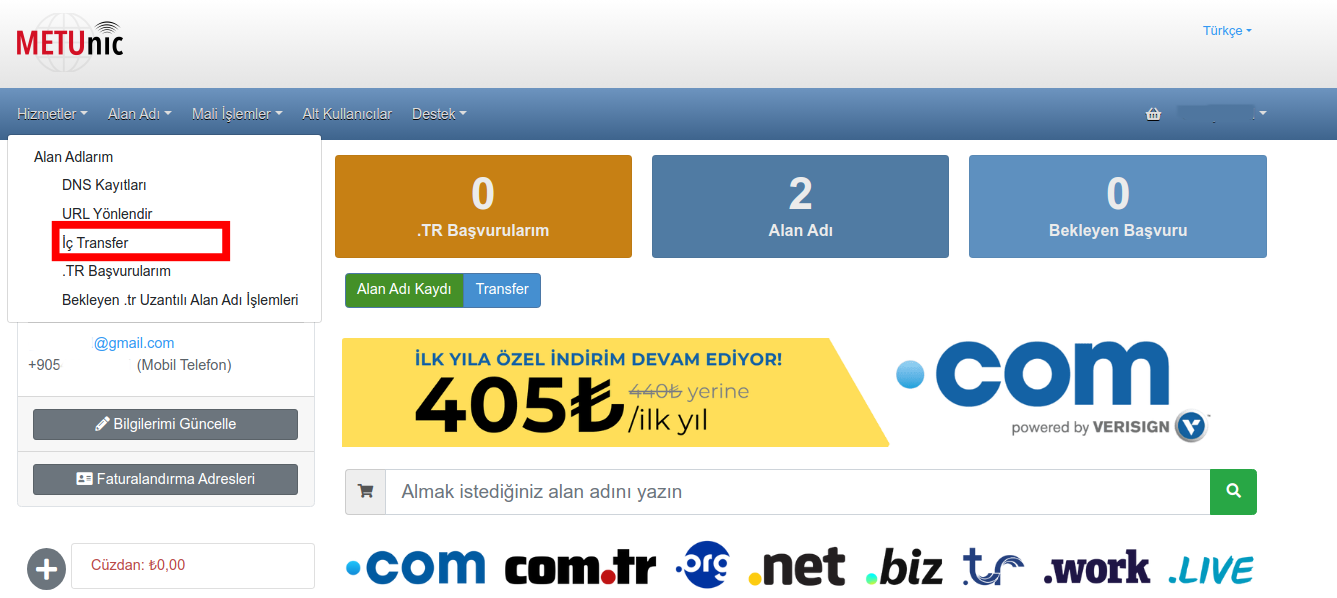
- Click the “Internal Transfer” heading in the top menu of your control panel.
- On the page that opens, go to the “Details” section next to the operation for the domain name that a transfer request has been created for you to receive.
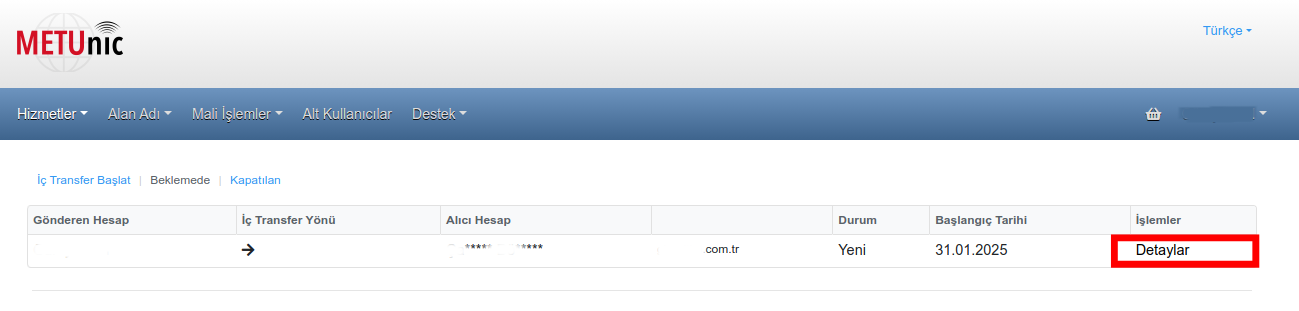
Approving or Rejecting the Transfer
- On this page, if you approve the internal transfer of the domain name from another METUnic account to your METUnic account, press the “Approve” button.
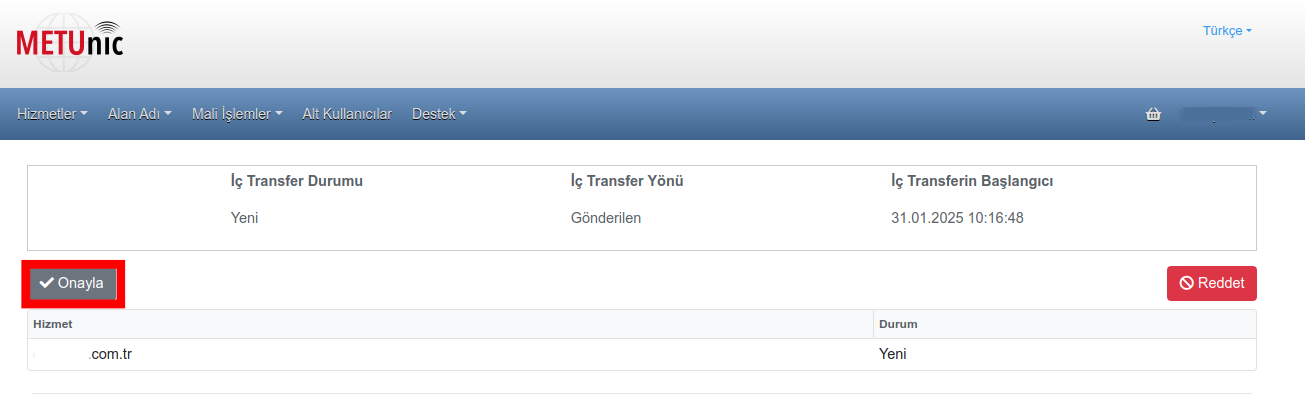
- If you reject the internal transfer of the domain name from another METUnic account to your METUnic account, press the “Reject” button.
- When you click the Reject option, you must state the reason why you want to reject the internal transfer.
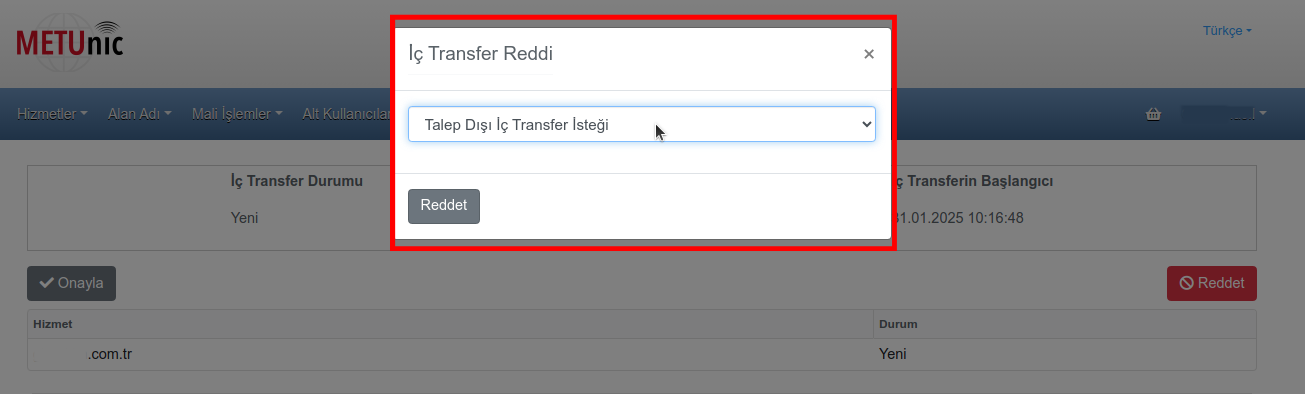
- After stating the reason for rejection, complete your operation by clicking the “Please confirm the cancellation.” button.
Was this article helpful?
Thank you for your feedback.
Still stuck? Our support team is here to help. Tell us your question and our experts will help you.