Contents
Guide to Creating a CSR (Certificate Signing Request) for cPanel 11.x
The instructions below explain step by step how to create a CSR on cPanel (Paper-Lantern Theme – Modern). To learn more about the importance of the CSR and your private key, you can read our "Certificate Signing Request Overview" article. If you have already created a CSR and obtained a trusted SSL certificate, you can skip the steps below by checking our SSL Installation Instructions article.
1. Log In to cPanel
To log in to cPanel, you can usually use the following address: https://domain.com:2083.
Note: When trying to access the cPanel login page, you may receive an error message such as "Your connection is not private". This is usually because your site's SSL certificate has not been verified.
Enter your username and password, then click the Log in button.

2. Go to the cPanel Home Page
After logging in successfully, view the cPanel home page.
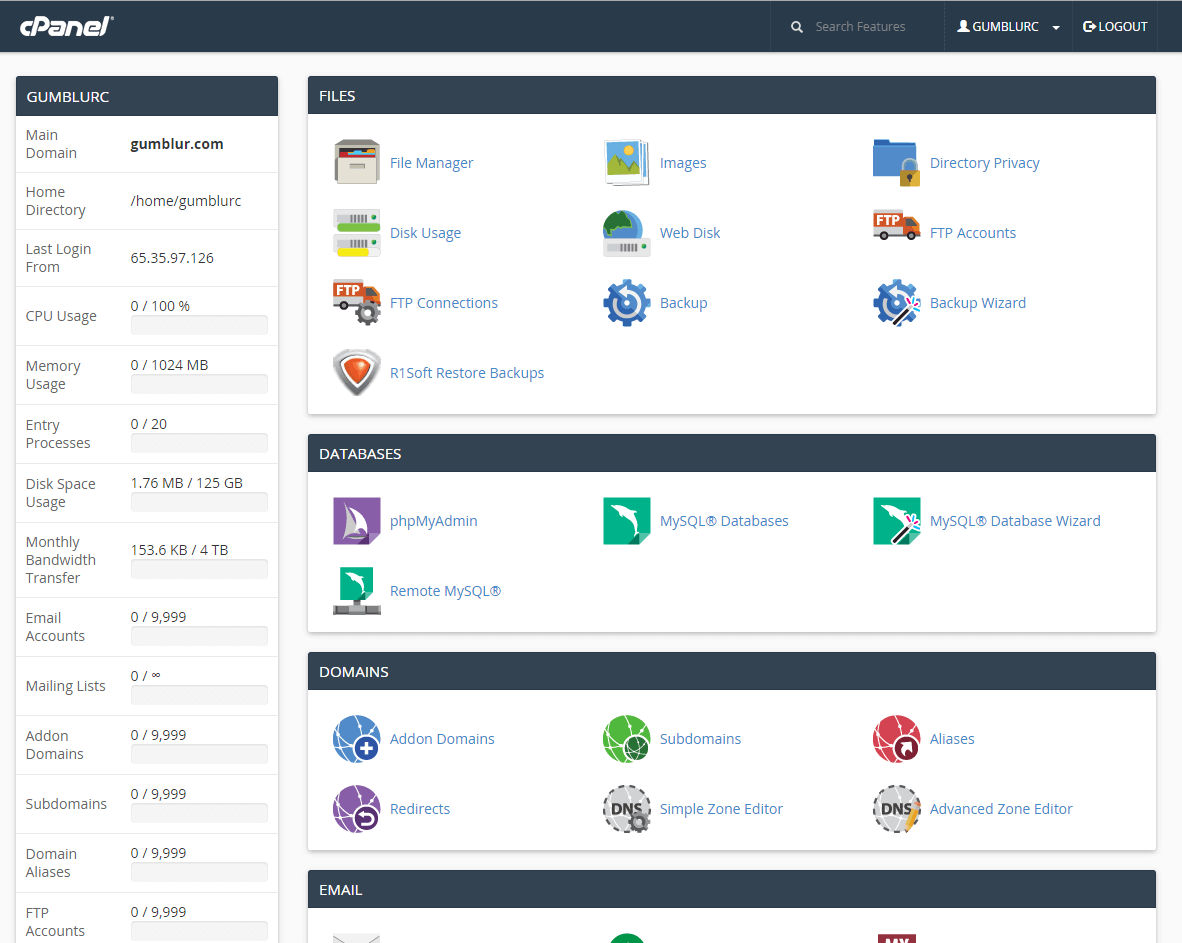
Note: Older versions (such as the X3 Theme – Classic) may look different from the image above, but they have the same category structure and logic.
3. Go to SSL/TLS Manager
To go to the SSL/TLS Manager page, go to the Security section and select the SSL/TLS button.

Note: You can also reach the SSL/TLS Manager page by using the Search feature in the upper right corner of the cPanel home page and searching for the word "SSL".
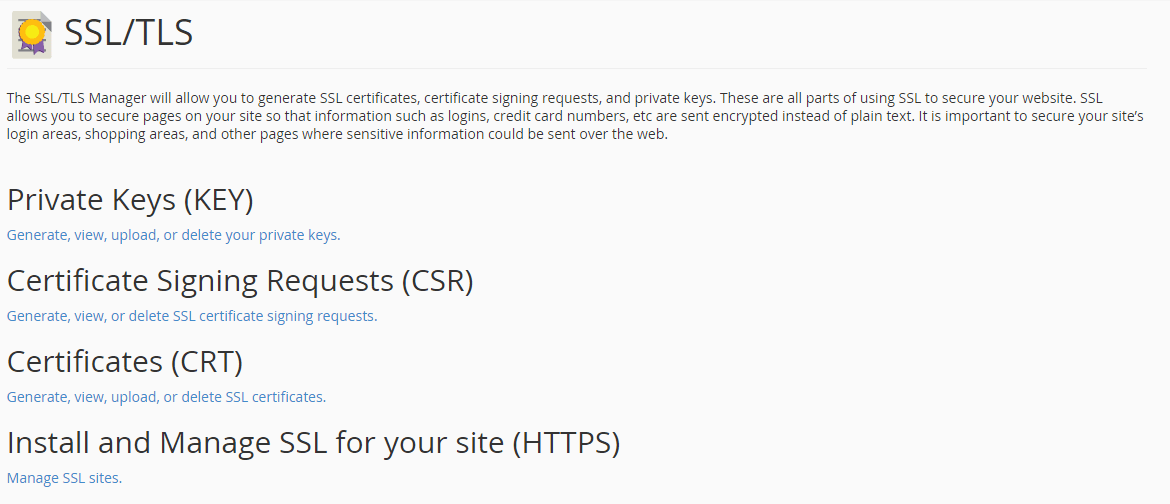
The SSL/TLS Manager page allows you to manage all of your SSL/TLS configurations on cPanel.
4. Select the Create CSR Option
Select the Generate, view, or delete SSL certificate signing requests (CSR) option.
Fill in the form that opens completely and click the Generate button.

Note 1: By default, when the "Generate a new 2,048 bit key" option is checked, cPanel will automatically create a private key. If you want to use a private key you created beforehand, you can select the relevant option from the Key drop-down menu.
Note 2: cPanel does not require a passphrase for the CSR, but it recommends entering descriptions such as "CSR for www.google.com 13/09/2016" so that you can easily recognize the CSR later on.
Note 3: To avoid common mistakes while filling in your CSR details, you can check our "Certificate Signing Request Overview" article.
5. Copy the CSR Code and Complete the Order
Congratulations! Your CSR has been successfully created and saved to your user directory.
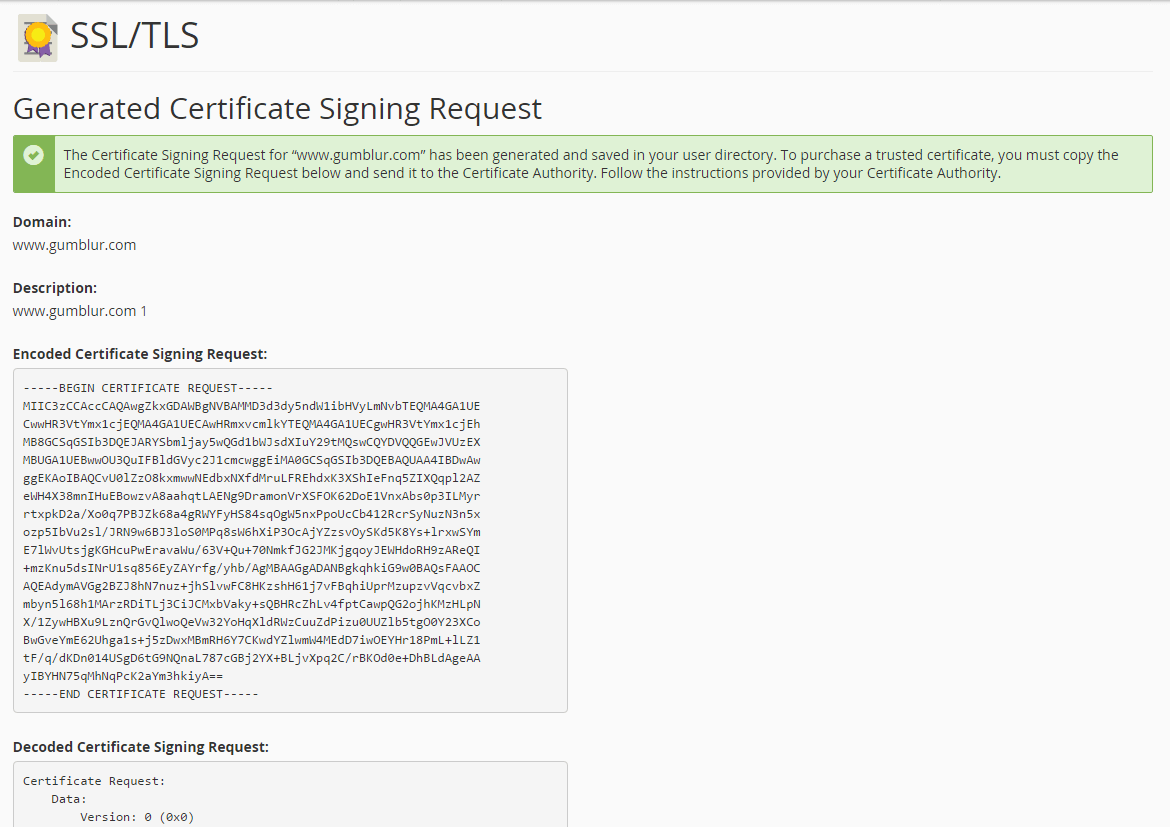
After the CSR is created, click the Encoded Certificate Signing Request box and copy all of the text. This text must include the following tags:
-----BEGIN CERTIFICATE REQUEST-----
and
-----END CERTIFICATE REQUEST-----
Then complete your SSL certificate order by pasting the CSR into the order form.
After you create the CSR, your order will be taken into the validation process by the Certificate Authority (CA). The validation process may vary depending on the certificate you purchased.
Was this article helpful?
Thank you for your feedback.
Still stuck? Our support team is here to help. Tell us your question and our experts will help you.