Contents
- 1. General Information About Audriga and the Migration Process
- 2. Preparation Before Switching to Business Email
- 3. Step-by-Step Migration Process
- METUnic Email Migration Process Steps
- Delta Migration (Optional / Final Sync)
- What is delta migration? / What happens to emails that arrive during the email migration?
This guide explains step by step how to transfer the data in your Yandex email accounts to the Business Email system using the Audriga infrastructure.
1. General Information About Audriga and the Migration Process
- Audriga is a data migration service that makes it easy to move data such as emails, contacts, calendars and files from one system to another.
- “Groupware migration” scenarios cover not only emails but also components such as the address book, calendar, tasks and notes.
- Migration is possible from systems such as Microsoft Exchange, Office 365, Zimbra and IMAP servers. Systems such as OpenXchange are supported as the target system.
- For data security, connections during migration are encrypted with SSL/TLS.
- Limitations: Public folders, archives, distribution lists and some permissions may not be migrated in every scenario. In addition, some technical limits may apply, such as a single mailbox limit or email attachment size.
2. Preparation Before Switching to Business Email
This process applies to users switching to Business Email from a different email provider or hosting company.
What You Need for the Migration:
- Old email address: The source account to be migrated.
- Old email password: The “App Password” for your Yandex account.
- Business Email access: An active Business Email account.
- Notification email: Preferably a different email address, to receive information about the status of the process.
What Is Migrated?
- Emails, the existing folder structure and the read/unread status of messages are migrated.
- Calendars and contacts are not migrated in this process.
3. Step-by-Step Migration Process
Creating an App Password in Yandex
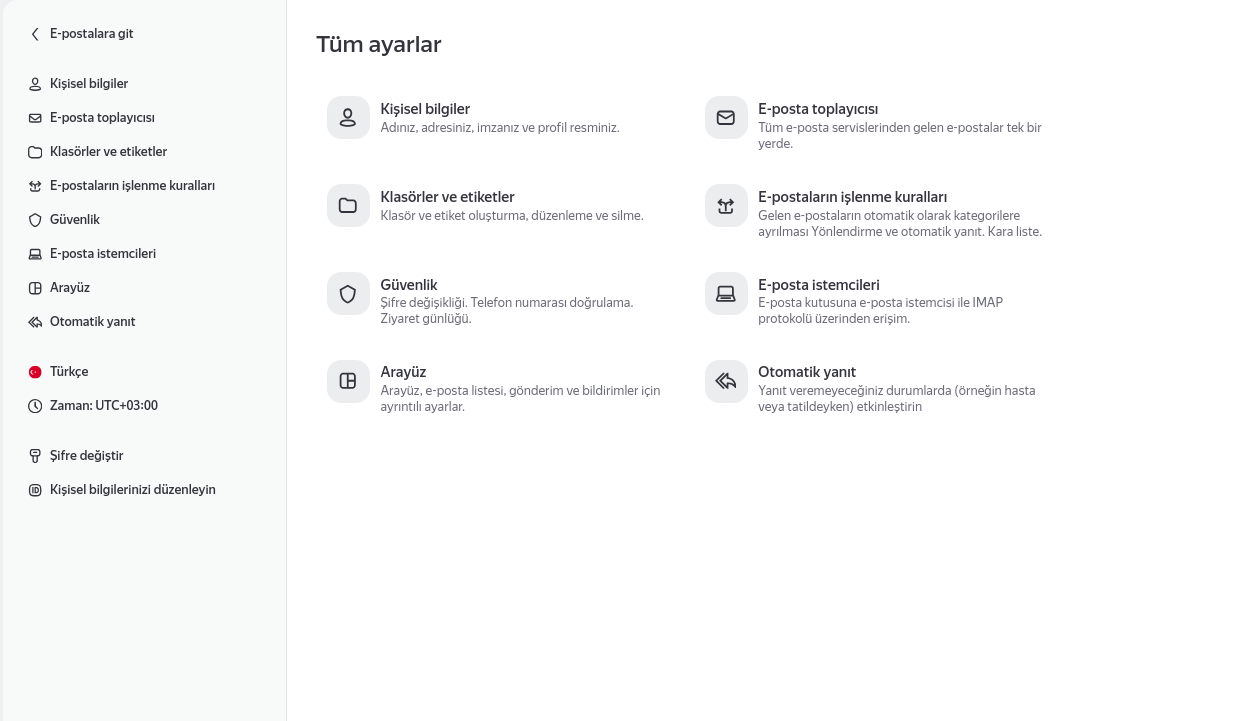
- Log in to your Yandex email account and open Settings > All settings > Security in that order.
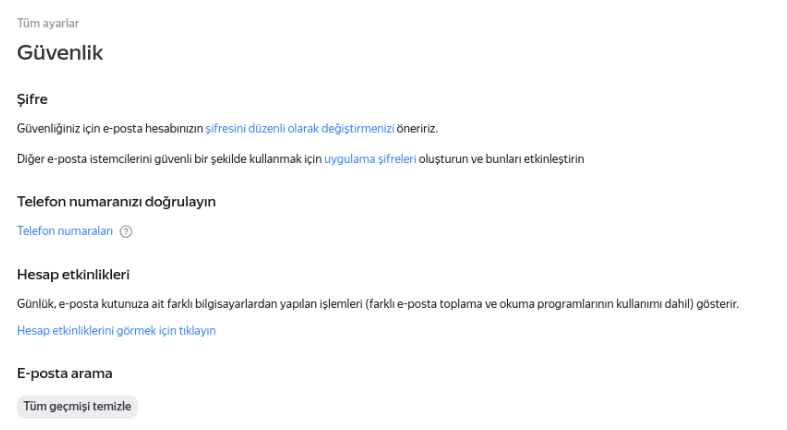
- Click the “App passwords” option under the “Access to your data” section.
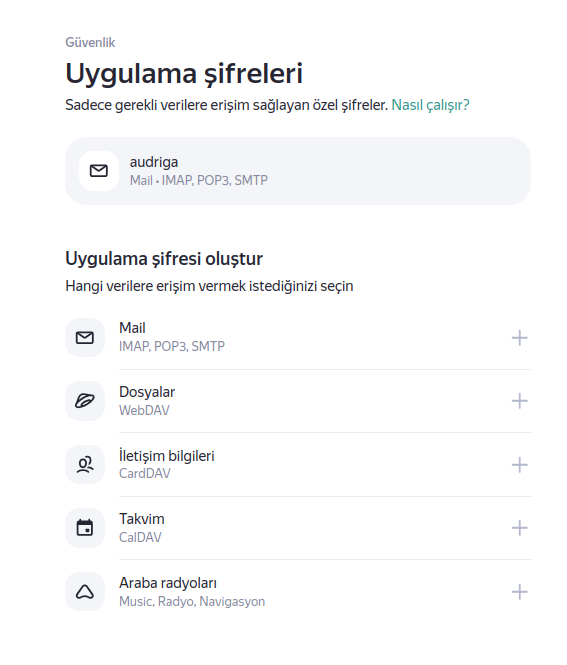
- Select the “MAIL” heading and click the “Create password” button.
- Give your password a reminder name (for example, the name of the application you will use).
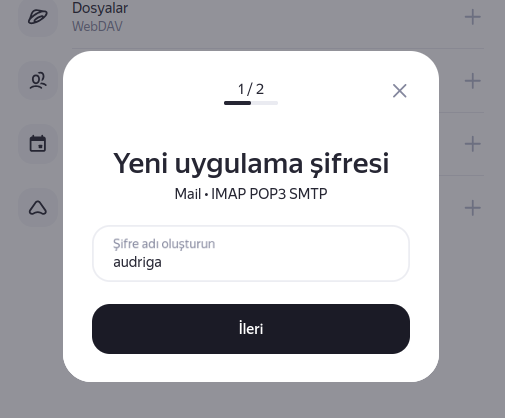
- When you click the “Next” button, your one-time app password will be displayed in a new window.
- Copy this password and save it in a safe place.
- Important Note: The generated password is shown on screen only once. If you accidentally close the window, you will need to delete the old password and create a new one.
Enabling the IMAP Protocol in Yandex Mail
To be able to view your emails in a different email client, the IMAP protocol must be active in your Yandex Mail account. You can follow the steps below to check and enable your IMAP settings:
Step 1: Log in to your Yandex Mail account through your web browser.
Step 2: Click the Settings icon and go to All settings in the menu that opens.
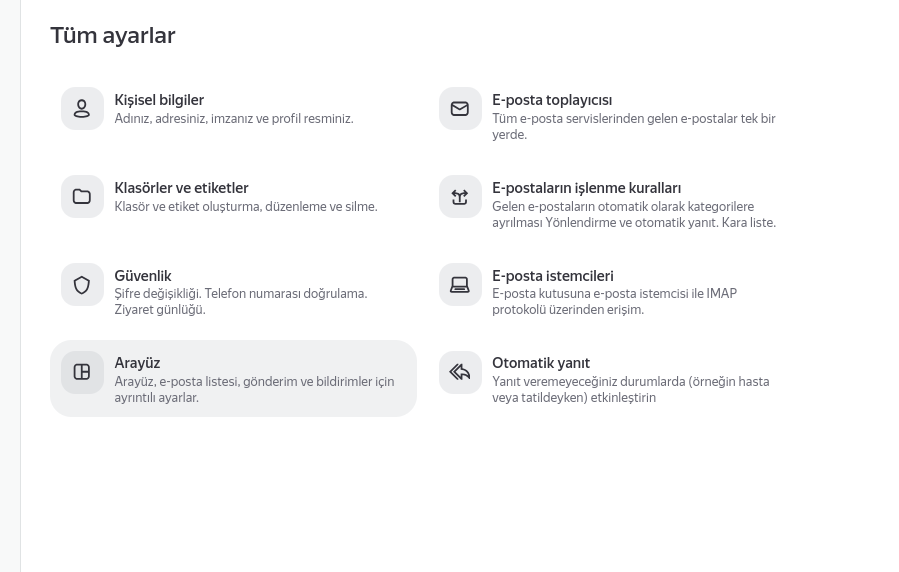
Step 3: On the settings page that appears, click the Email clients tab.
Step 4: On the screen that opens, under the heading “Allow the mail client to access the mailbox”, check the box next to the “From the imap.yandex-team.com server via IMAP” option.
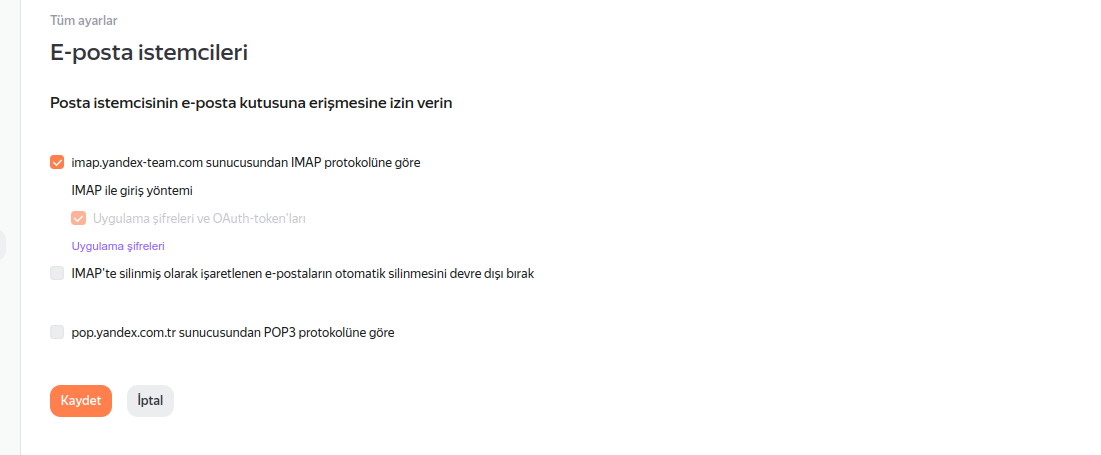
Step 5: To apply your change, click the orange Save button at the bottom left of the page.
After completing these steps, the IMAP protocol will have been successfully enabled for your Yandex Mail account.
METUnic Email Migration Process Steps
1. Introduction
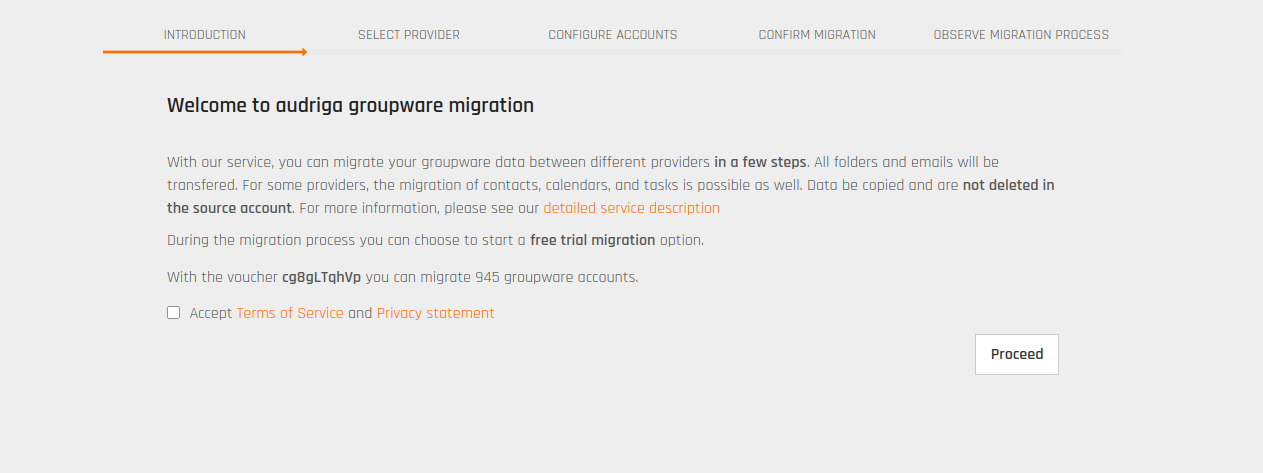
Go to the Audriga page and accept the terms of service (Terms of Service, Privacy Statement).
2. Select Provider
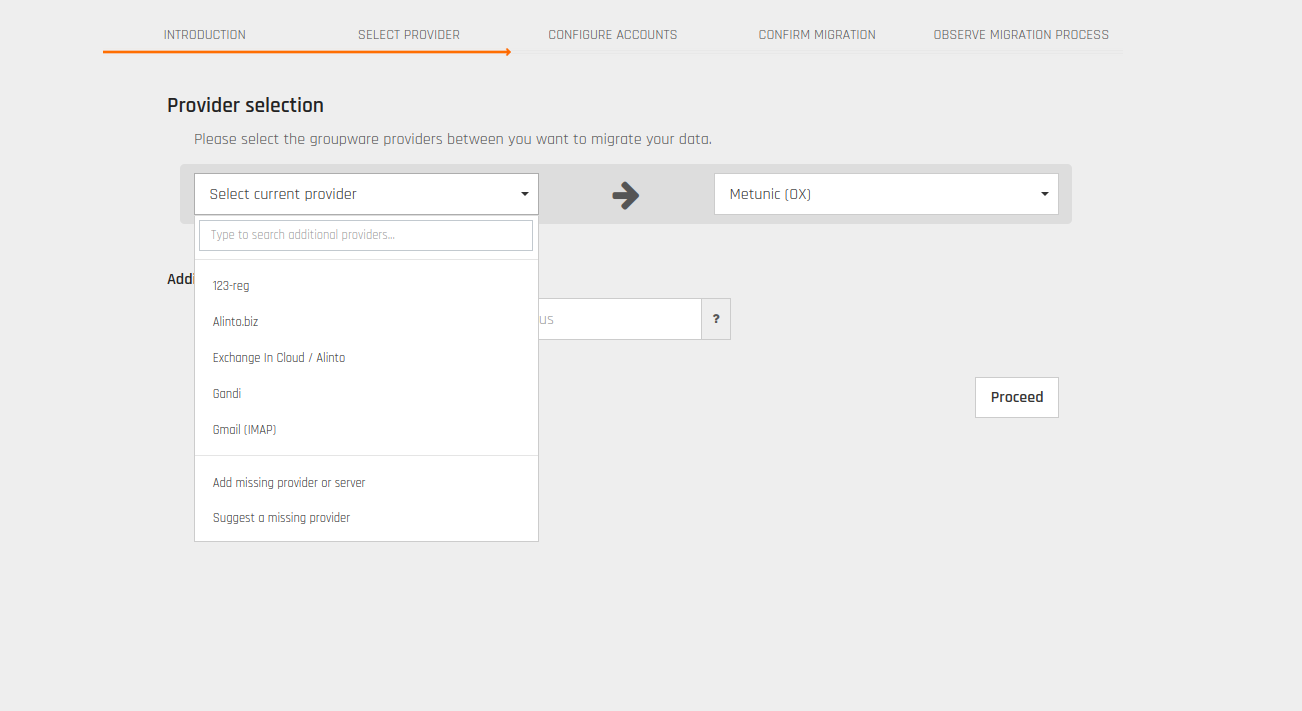
- In the Current provider section, select “ Add missing provider or server “.
- On the “ Add provider or server “ screen that opens, type the address “ imap.yandex.com.tr in the “ Please enter the hostname or IP address “ field and click the “ Check “ button.
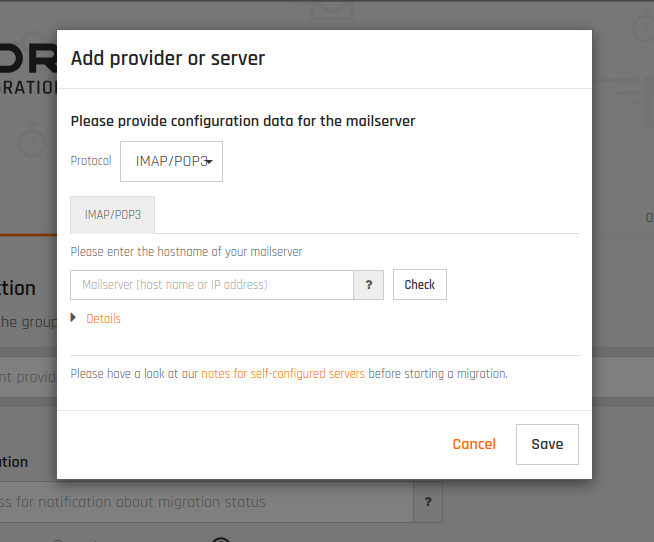
- After the check completes successfully, click the “Save” button.
- The target is automatically selected as OX App Suite Cloud (EU).
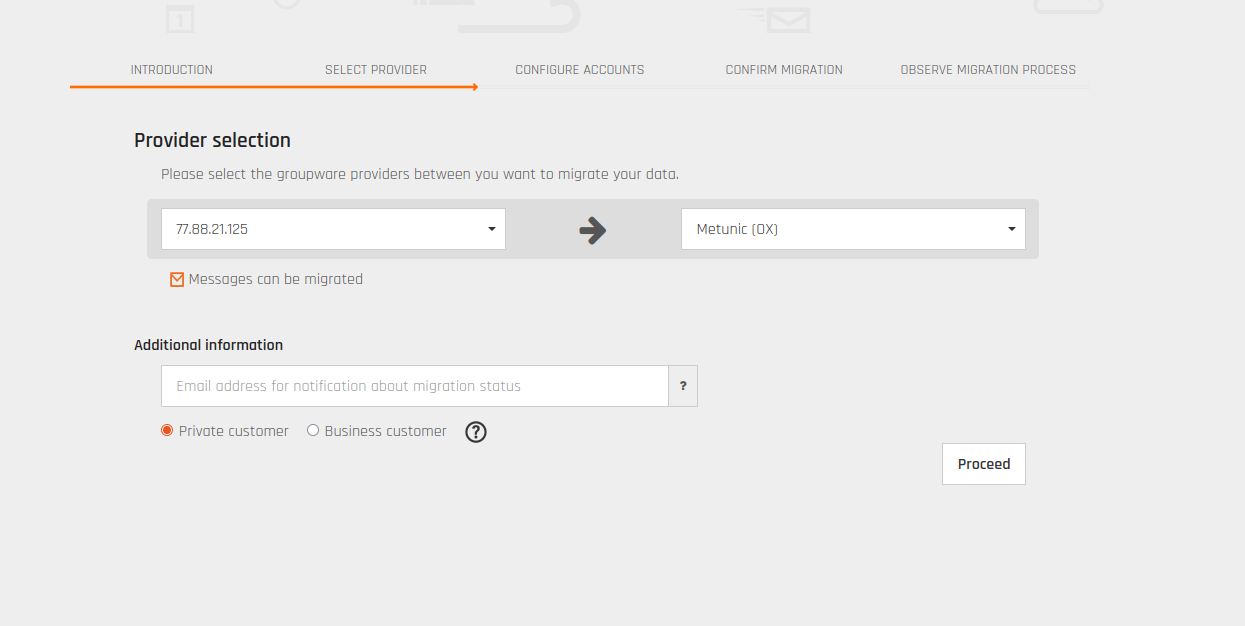
- Enter an alternative email address to receive notifications.
- Select the “Private / Business customer” account type and click the “Proceed” button.
3. Configure Accounts
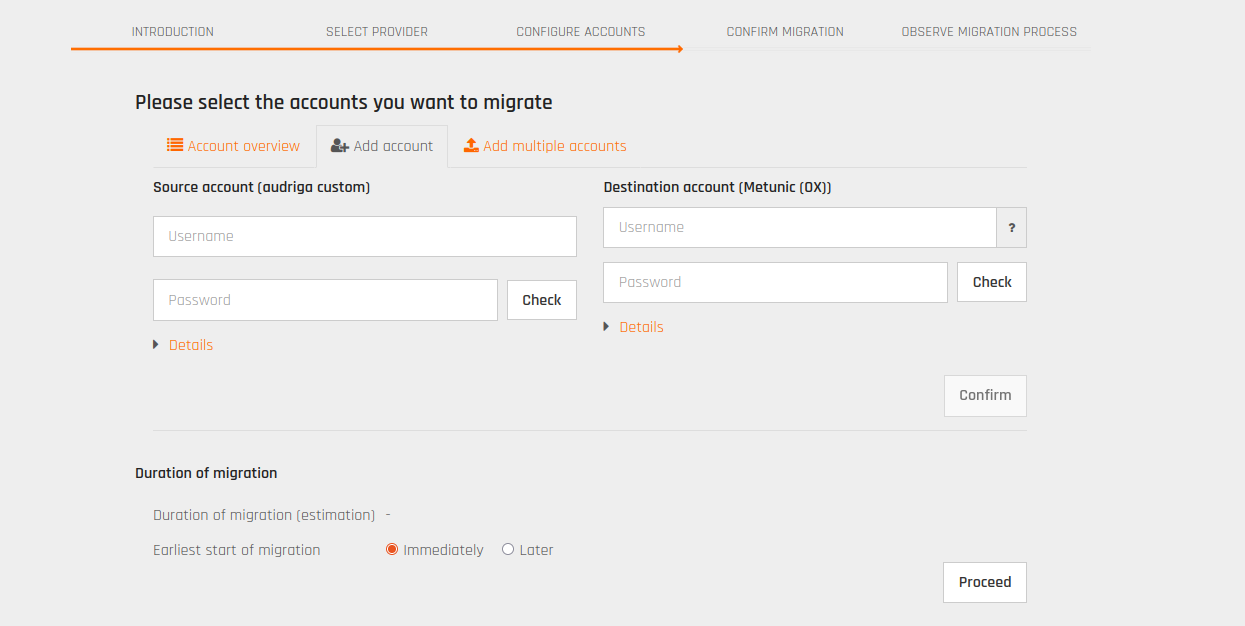
- Under the Source account (audriga custom) heading, enter the details of the email account to be migrated.
- In the Password field, enter the “ App Password” obtained from “ Yandex “.
- Under the Destination account (Metunic (OX)) heading, enter the email address obtained through METUnic.
- In the Password field, enter the “ METUnic Webmail login password”.
After entering the details, click the “ Check” button to verify them.
If the connection is successful, the account is marked with a green ✔ and you click the “ Confirm “ button.
After confirming, click the “ Proceed” button.
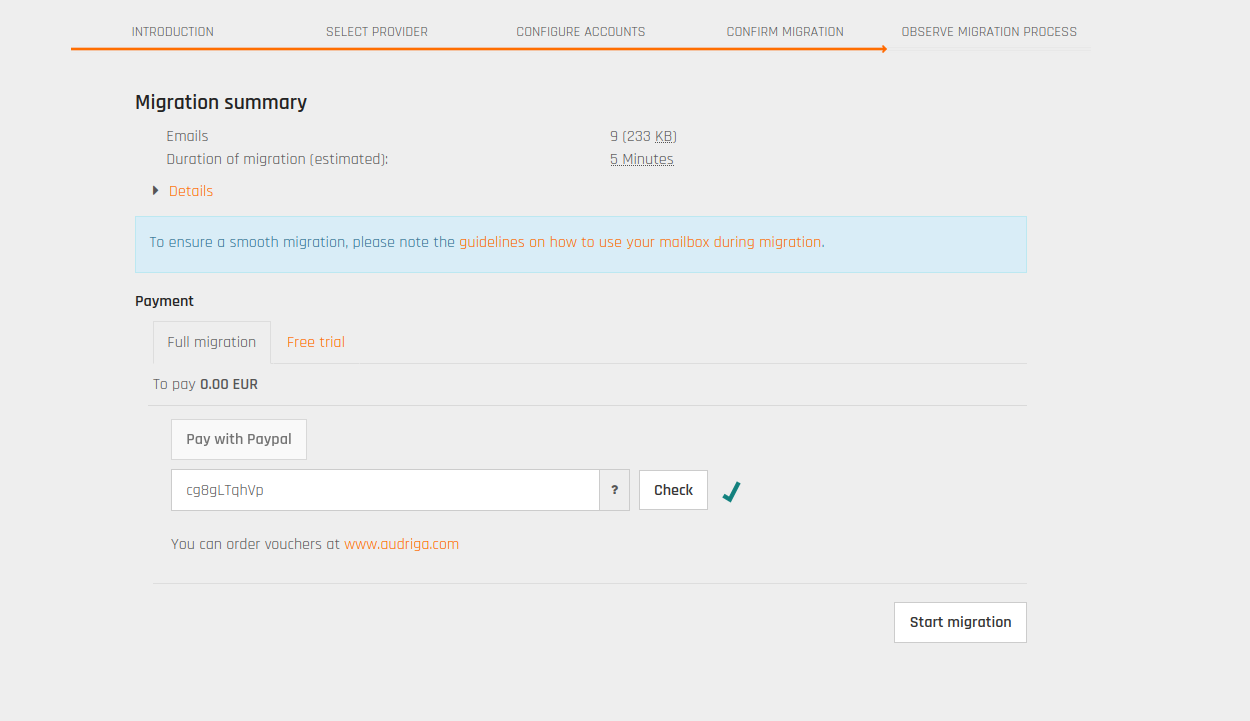
4. Confirm Migration
- 1. Review the summary information on the screen.
- 2. Start the migration process by clicking the “Start migration” button.
- 3. When Audriga starts the process, the following emails are sent:
- • Your migration is configured
- • Your migration has just started
- • Your migration is successfully completed
5. Observe Migration Process
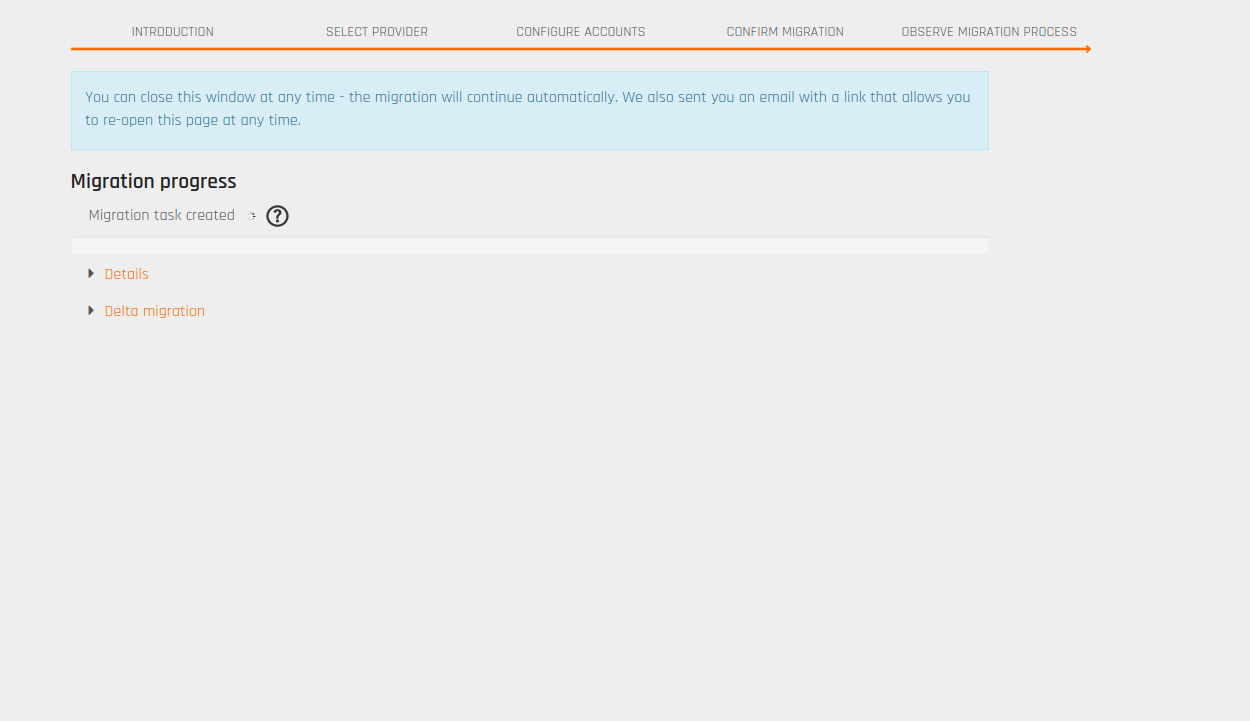
- Track the migration progress on the Migration progress screen.
- Detailed logs can be accessed through the Protocol link.
- Accounts that return errors can be identified and restarted. (They are restarted with the “retry” option in the Audriga panel.)
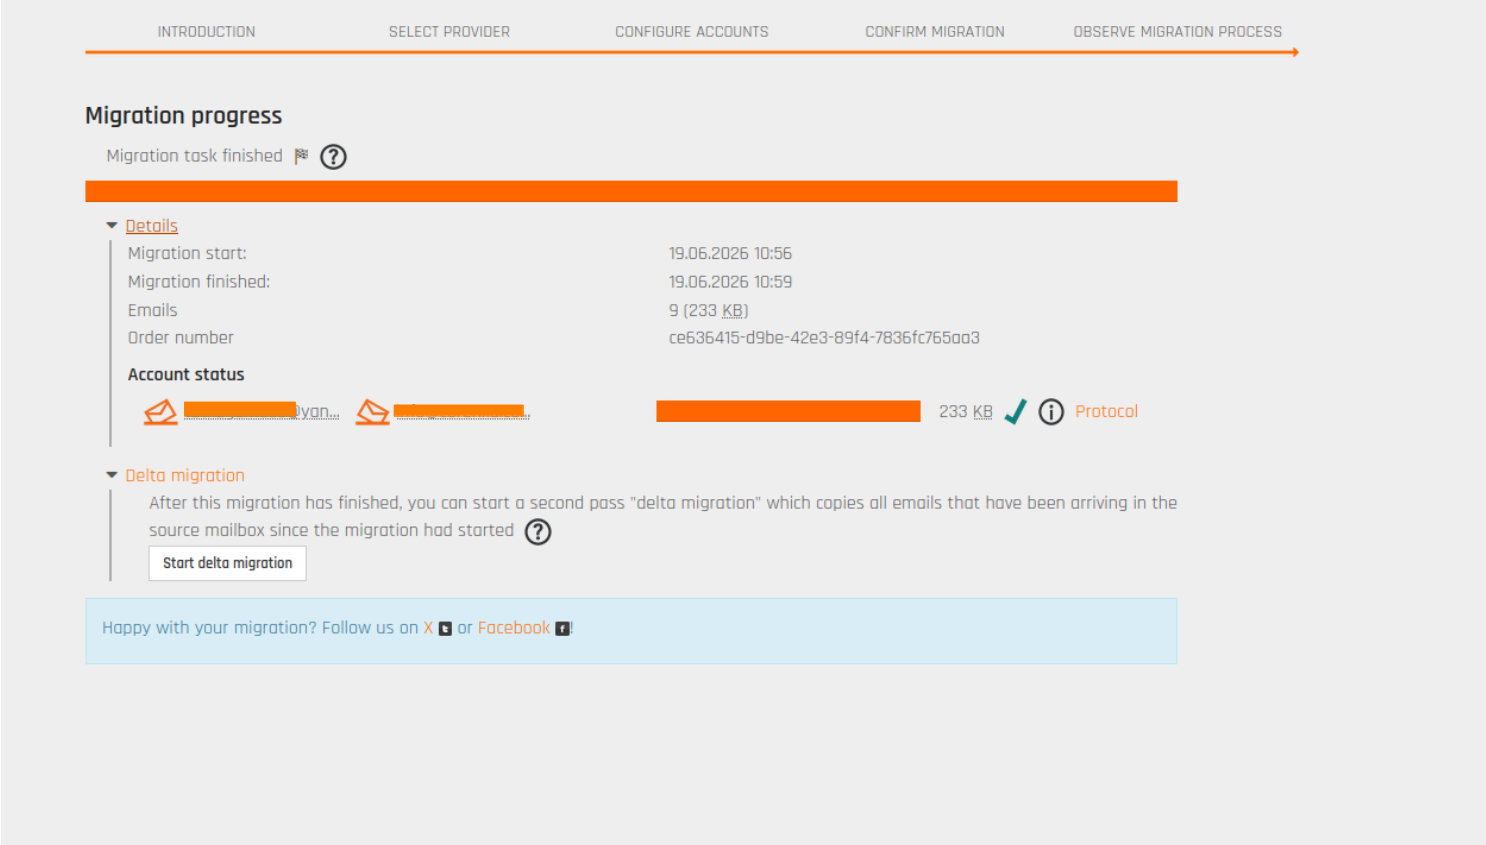
When the Migration Is Completed
- The Migration task finished message appears on the screen.
- If there are no errors, a ✔ mark appears.
Delta Migration (Optional / Final Sync)
After the MX records have been pointed to the new system, the last emails that arrived on the old system after the migration are transferred with Start delta migration. This way, no email is lost.
What is delta migration? / What happens to emails that arrive during the email migration?
The email migration applies from the time you start the process.
Emails that arrive at your current email address after the migration process has started are not transferred.
Therefore, you need to perform an additional migration to transfer the emails that arrive at your email address during the migration process.
By following the steps below, you can transfer the emails you received during your migration process.
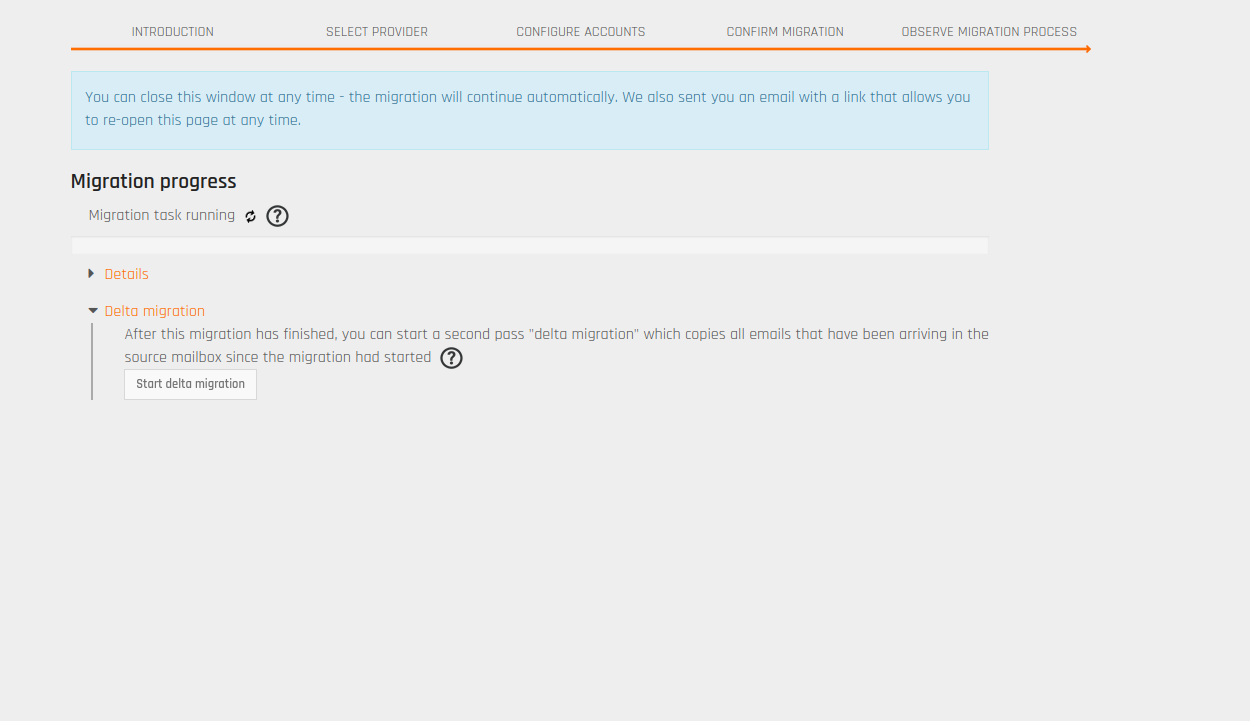
- 1. After your migration is completed, click the link in the email sent from the “noreply@audriga.com” address confirming that the process is complete.
- 2. On the screen that opens, select the “Delta migration” option and click the “Start delta migration” button to complete your migration.
Was this article helpful?
Thank you for your feedback.
Still stuck? Our support team is here to help. Tell us your question and our experts will help you.