We show step by step how to add your Business Email account to Gmail via POP3, with the server and port details. We also explain the SMTP settings for sending from that address in Gmail and how to fix common errors.
·3 min read
Access from email programs (Outlook, Apple Mail, Gmail, etc.) via IMAP, POP and SMTP is available in Business and higher Business Email packages; with the Free and Starter packages, you access your emails through webmail.
This document has been prepared for configuring METUnic Business Email accounts in the Gmail application.
The guide explains step by step how to access the necessary settings through the Business Email Webmail interface, how to select the appropriate account type in the Gmail application, and how to correctly define the IMAP / SMTP server details in the Gmail client.
Accessing Gmail Settings
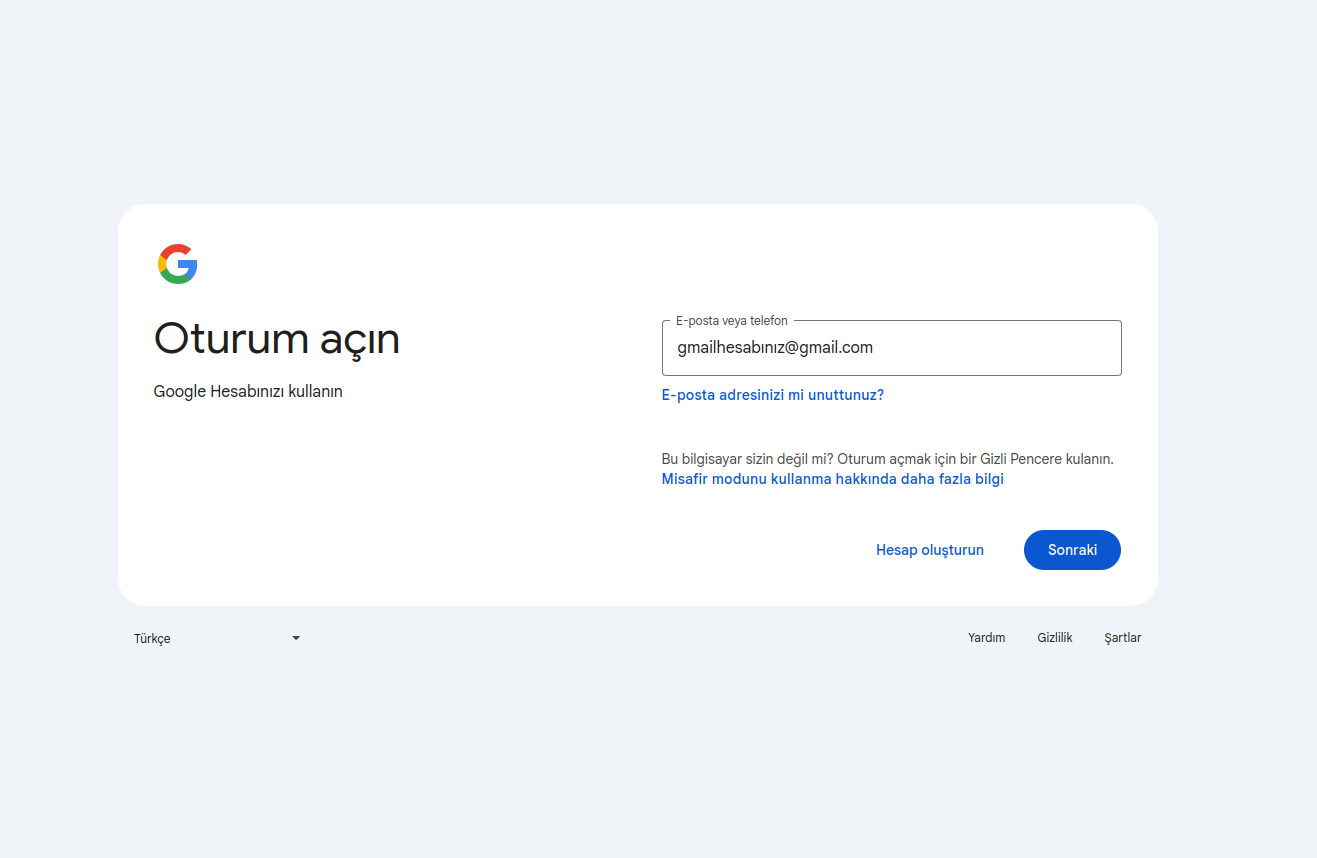
1) Sign In to Gmail
First, sign in to your personal Gmail account to add your email account.
2) Open the Settings Menu
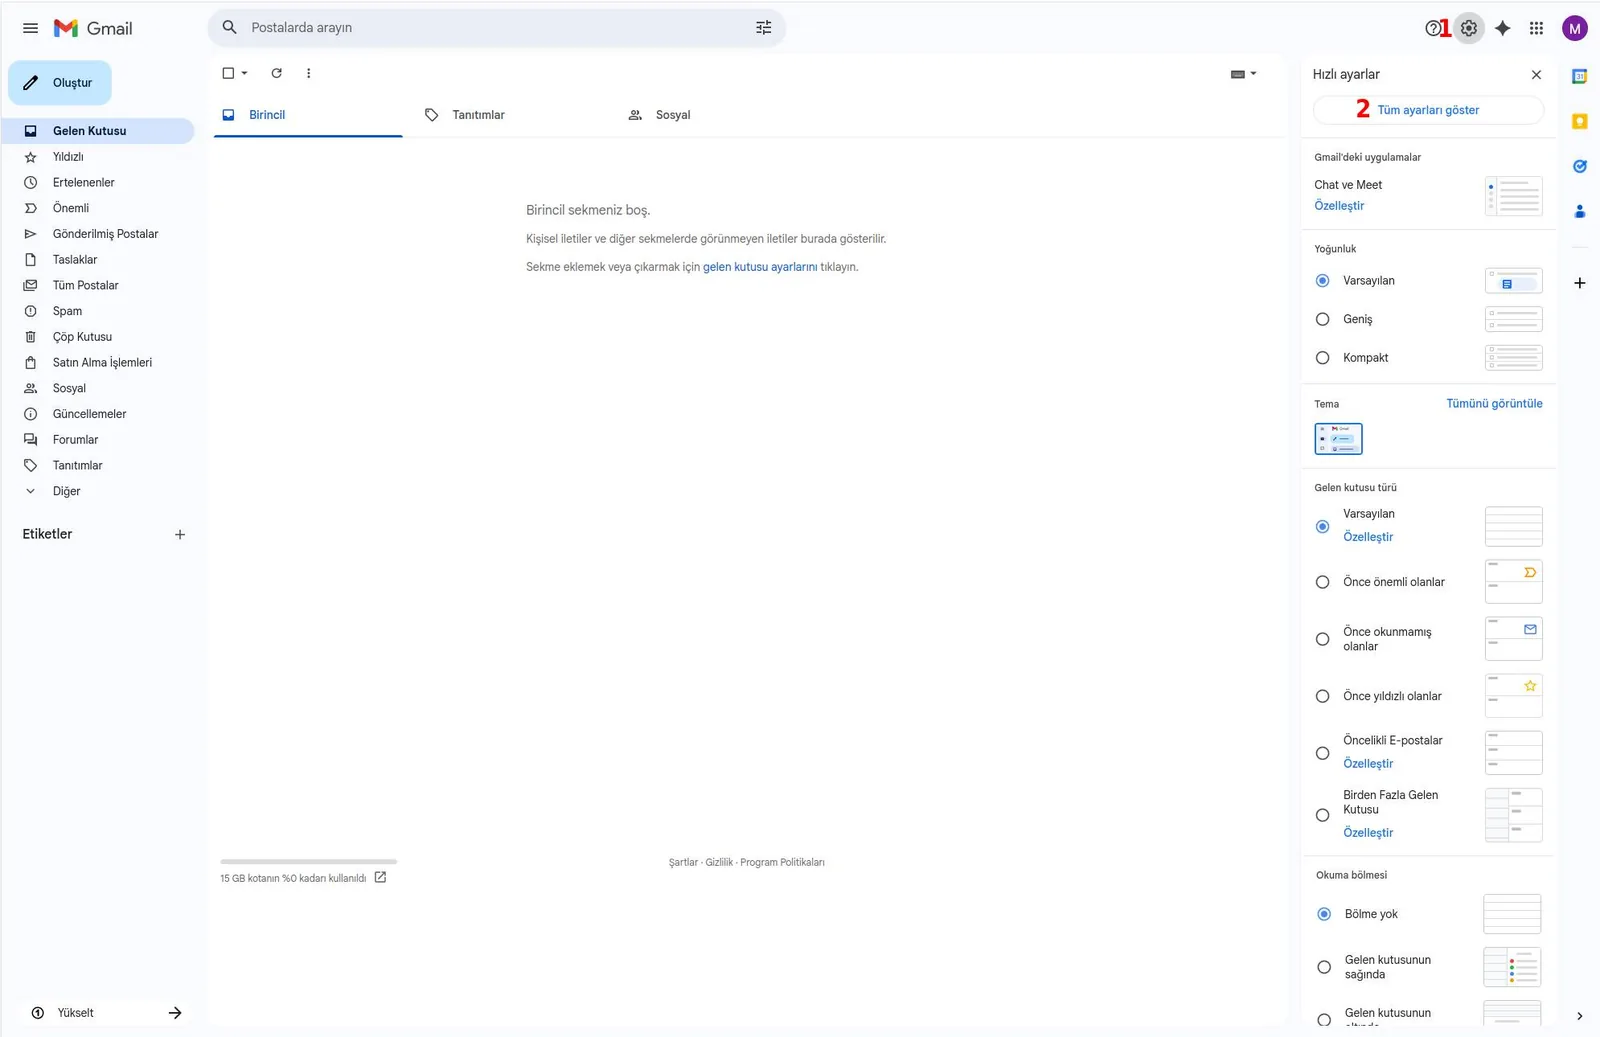
Click the ⚙️ (Settings) icon in the upper right corner of the Gmail screen.
From the panel that opens, select the “See all settings” option.
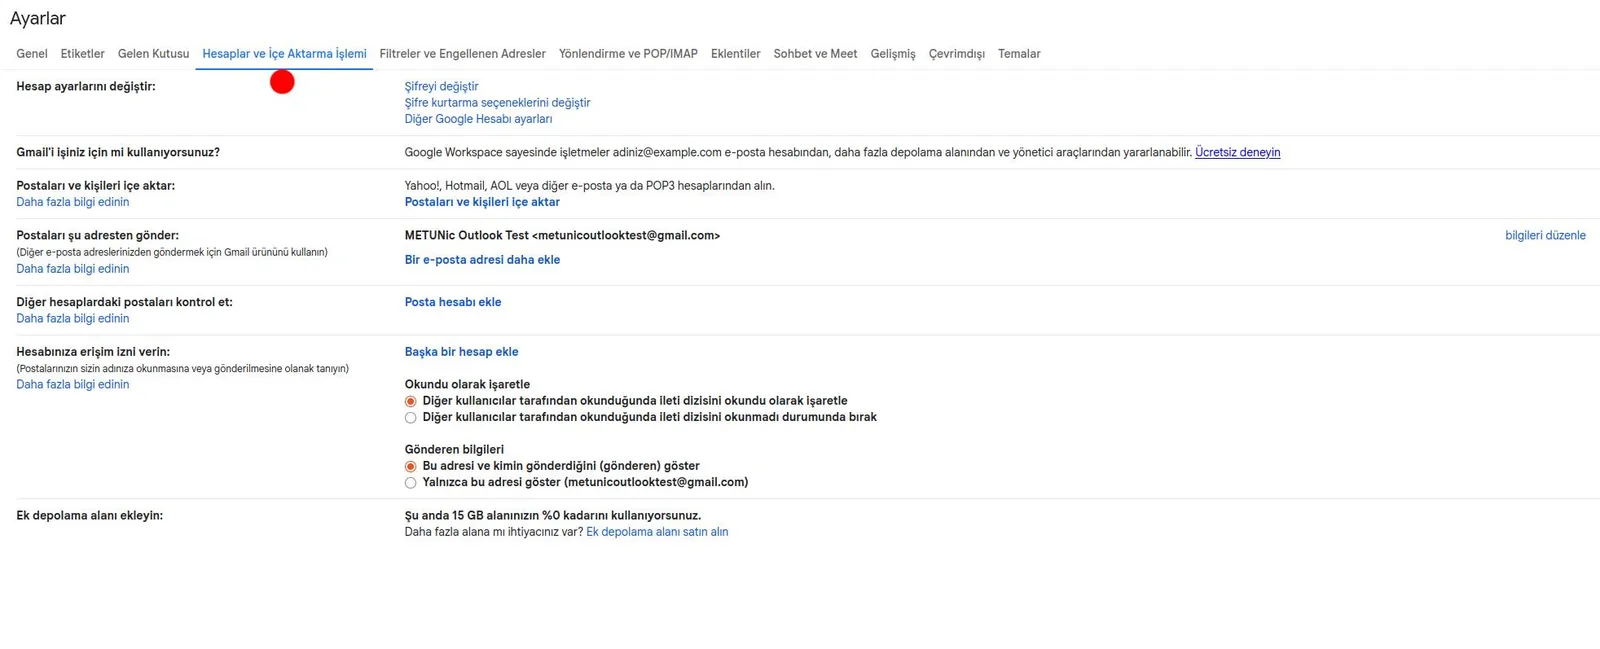
3) Open the Accounts and Import Tab
On the Settings page:
Click the “Accounts and Import” tab.
This section is the main area where external email accounts are added to Gmail.
Adding the Business Email Account
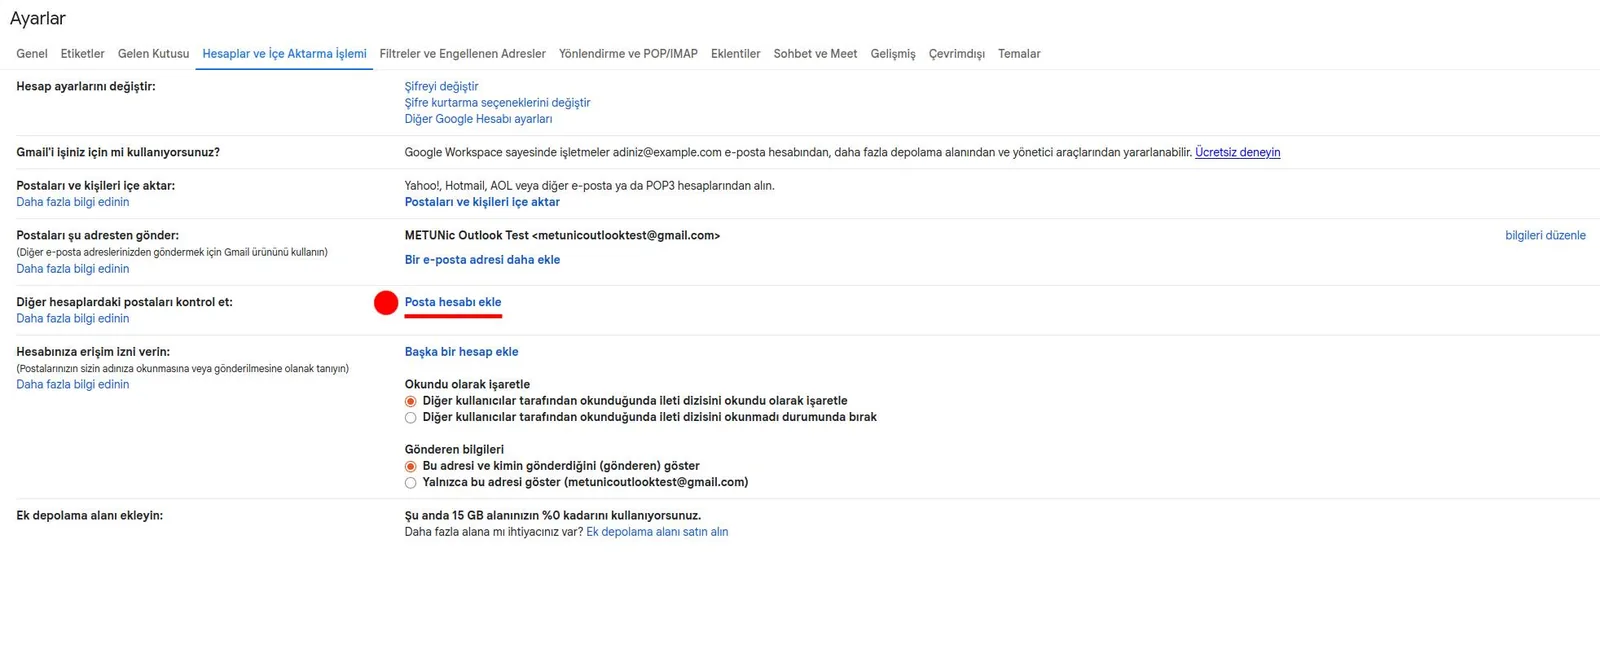
4) Check Mail from Other Accounts
Click the “Add a mail account” link next to the “Check mail from other accounts” heading.
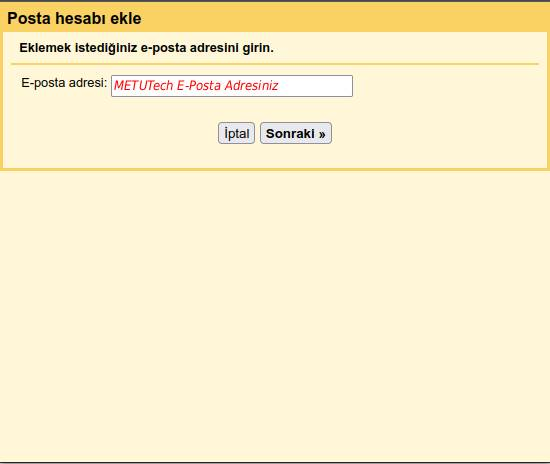
5) Enter the Email Address You Want to Add as POP3
In the window that opens:
Enter the business email address you want to add to Gmail. (E.g.: kullanici@mnic.tr)
Click the Next button.
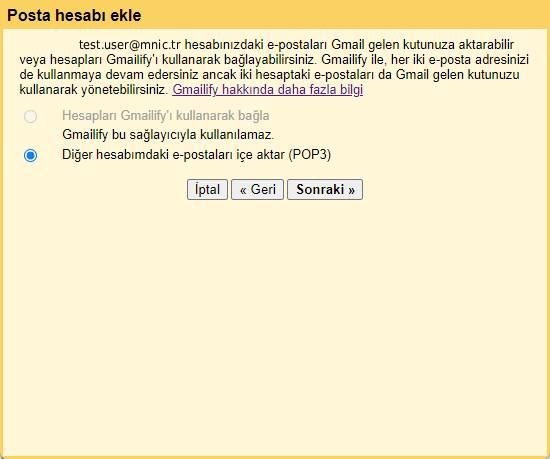
6) Import Emails from My Other Account (POP3)
In this step:
The “Import emails from my other account (POP3)” option is selected by default.
Continue with this option.
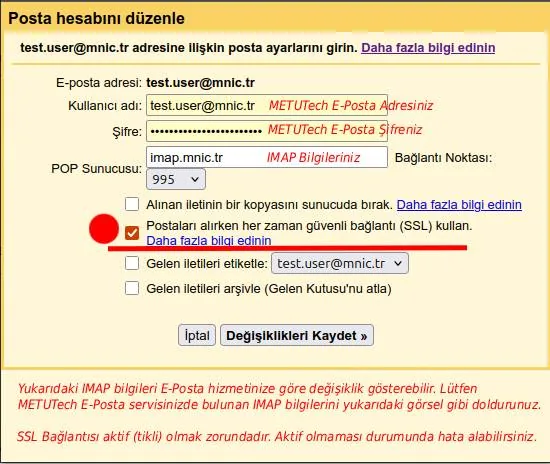
7) Enter the POP Server Details (Business Email)
Enter the following details:
The POP details are below. You can continue with your device integration using these details.
server : pop.mnic.tr
Port : 995
Connection : SSL / TLS
Username : mail address (your webmail address for the account you want to connect)
Passwords : Your account password
Setting Up Email Sending
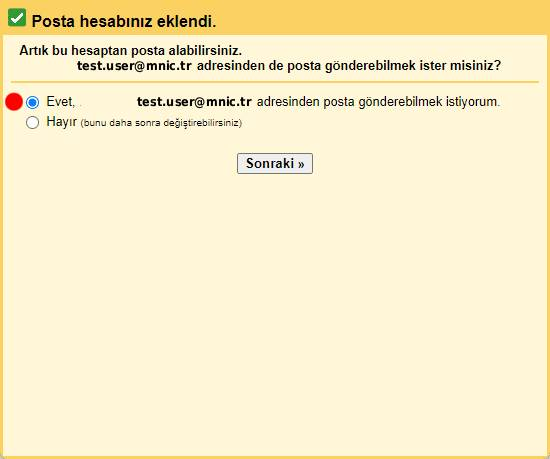
8) Select “Yes” to Send Email Through Gmail
In this step:
It is recommended that you continue with the Yes option to the question “Would you like to be able to send mail as this address?”
To be able to send mail via SMTP, the mail server must support SSL/TLS (available in Business Email).
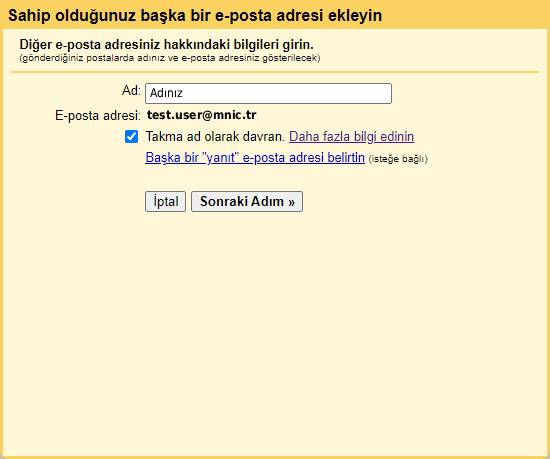
9) Set the User Name
Fill in the Name field as you wish
The “Treat as an alias” option must remain checked
With this setting:
Gmail and business mail appear in a single inbox.
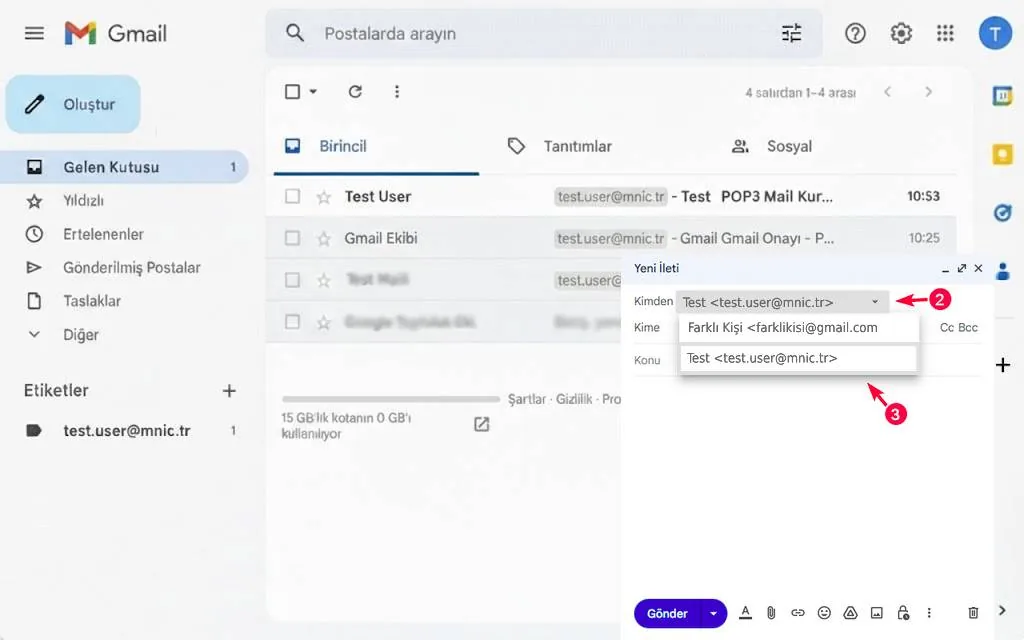
The “From” address can be selected when sending.
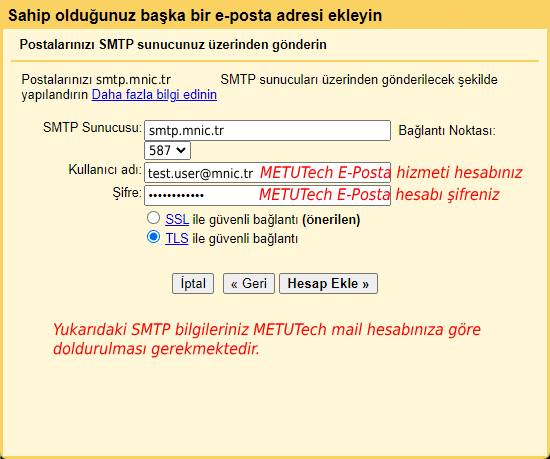
10) Enter the SMTP Server Details (Business Email SMTP Settings (Sending Mail from Gmail)
SMTP server:smtp.mnic.tr
Port:587
Security:TLS
Username:kullanici@mnic.tr
Password: The email account password
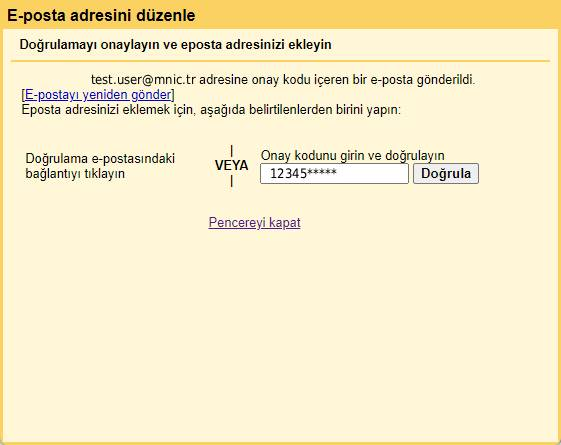
11) Enter the Verification Code
Gmail sends a verification code to your email address.
Enter this code in the relevant field and click the Verify button.
Completing the Setup and Troubleshooting
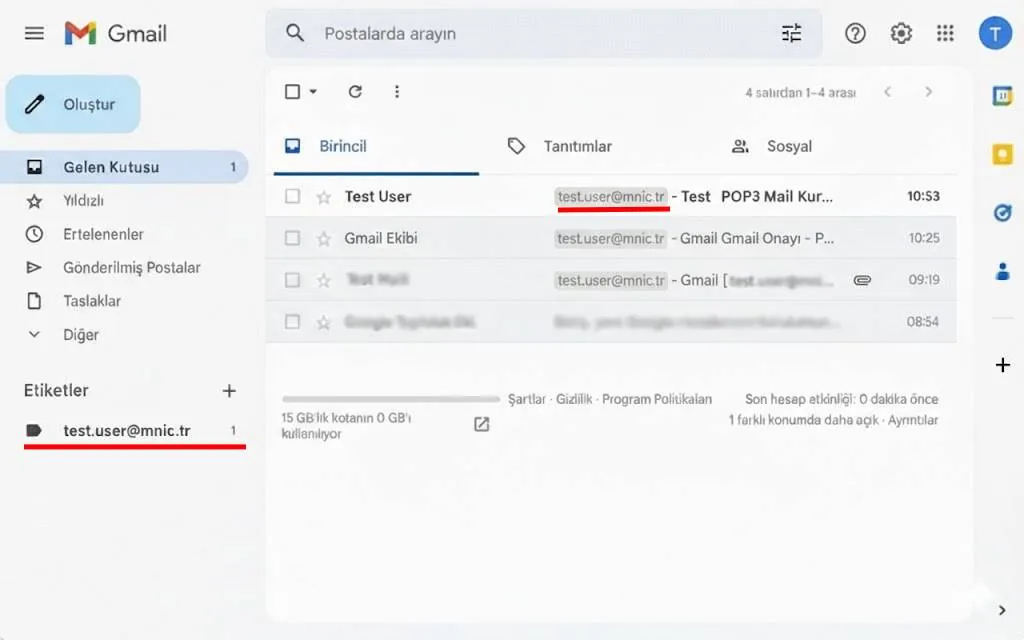
12) Setup Complete
Incoming Mail
Mail arriving at your business email address is displayed in Gmail as a label.
By clicking the label created with your email address in the left menu, you can see only these emails.
Sending Mail
When composing a new email, you can select the kullanici@mnic.tr address from the From field.
If sending and receiving mail work without problems, the setup has been completed successfully.
13) If You Have Problems, Check Settings → Accounts and Import
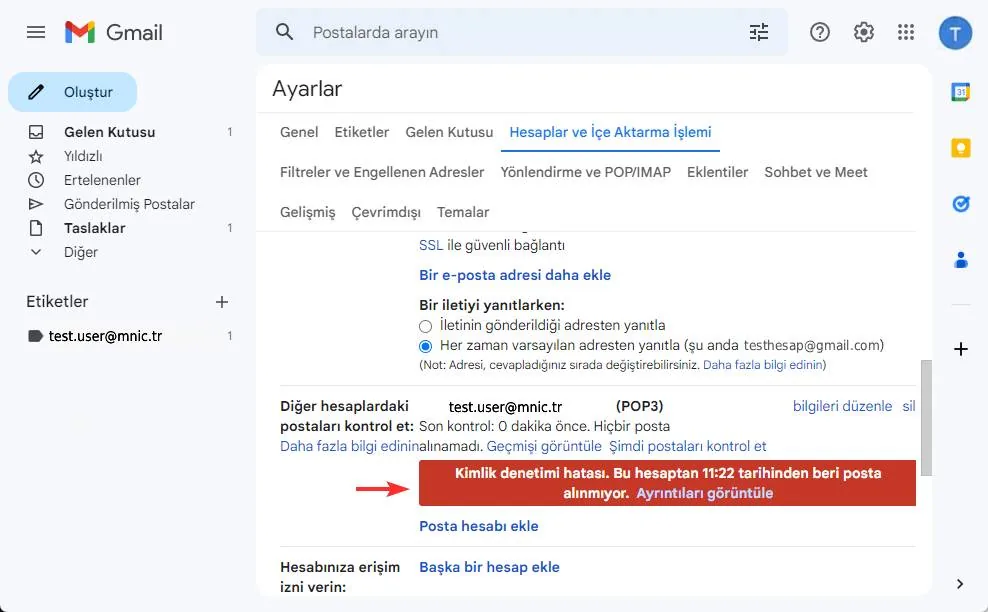
You can view error messages in the “Check mail from other accounts” area
For example:
If the mail password has changed and Gmail has not been updated, you will get an Authentication error.
The problem can be fixed with the Update info option.
Was this article helpful?
Thank you for your feedback.
Still stuck? Our support team is here to help. Tell us your question and our experts will help you.
We explain that Turkcell's free email service YaaniMail closes on 31 October 2026 and what this means for its users. We show step by step how to move your emails to Business Email using Audriga.
We walk you through moving messages from your Yandex email accounts to Business Email using Audriga. We also explain creating an app password, enabling IMAP and running a delta migration for the latest emails.
We walk you through adding your Business Email account to the Outlook app on iPhone and iPad using IMAP. We also show the IMAP and SMTP server settings you need and how to find them in your webmail settings.