Access from email programs (Outlook, Apple Mail, Gmail, etc.) via IMAP, POP and SMTP is available in Business and higher Business Email packages; with the Free and Starter packages, you access your emails through webmail.
Contents
This post has been prepared for configuring METUnic Business Email accounts in Apple Mail on iOS (iPad and iPhone) devices.
The guide explains step by step how to access the required settings through the Business Email Webmail interface, how to choose the right platform for setting up Apple Mail on iOS devices, and how to correctly define the IMAP / SMTP server details in the Apple Mail client.
Adding an Account in Apple Mail
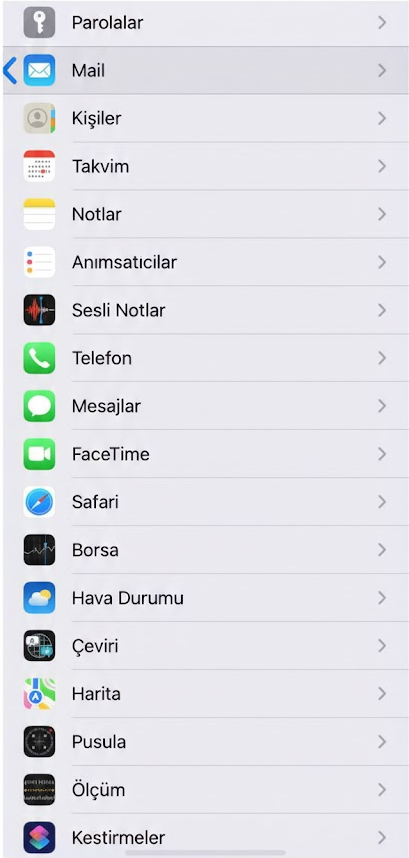
1. Go to Accounts
- From the iPhone Settings menu, tap Mail > Accounts.
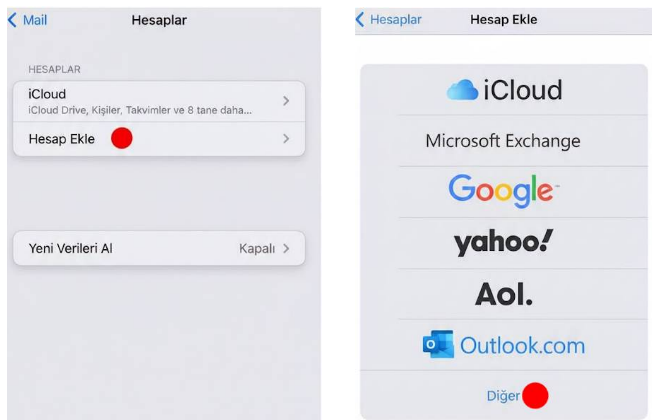
2. Select Add Account
- On the Accounts page, tap Add Account, then tap the Other option at the bottom.
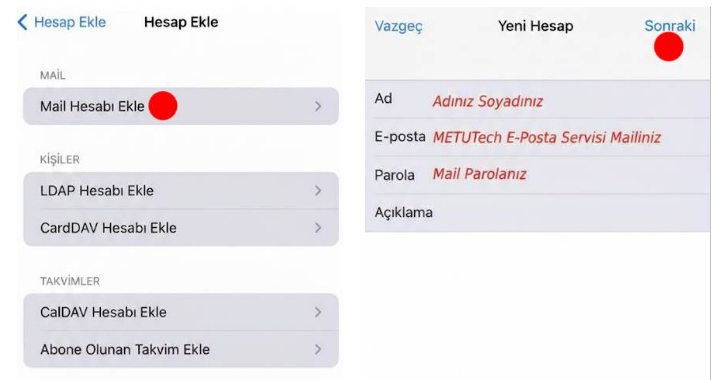
3. Enter Your Details
- Tap Add Mail Account and fill in the following information according to your own account:
- Name: Your name as it will appear in emails.
- Email: Your Business Email address (e.g.
hesapadiniz@mnic.tr). - Password: The password of your mail account.
- Description: A name that identifies the account (e.g. Work Mail).
- Then tap the Next button.
Entering the Server Details
4. Enter the Detailed Information
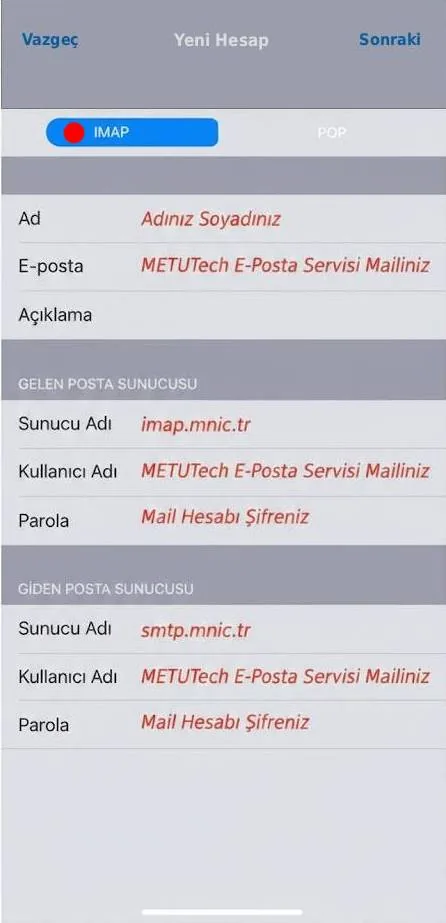
- Make sure the IMAP tab at the top is selected and enter the information as follows:
- Incoming Mail Server:
- Host Name:
imap.mnic.tr. - User Name: Your full email address.
- Password: Your email password.
- Host Name:
- Outgoing Mail Server:
- Host Name:
smtp.mnic.tr. - User Name: Your full email address.
- Host Name:
- Incoming Mail Server:
- Password: Your email password.
You can view the SMTP / IMAP server details above in the earlier post we published about accessing SMTP details. They may vary depending on your email service.)
You can access your SMTP and IMAP details by logging in to https://mail.mnic.tr/ with your account, clicking the Settings (⚙️) icon at the top right, clicking “Connect your device” in the menu that opens, choosing “Configure a specific device or app”, then iPhone or iPad, and then clicking “Show manual configuration options” under the Email option.
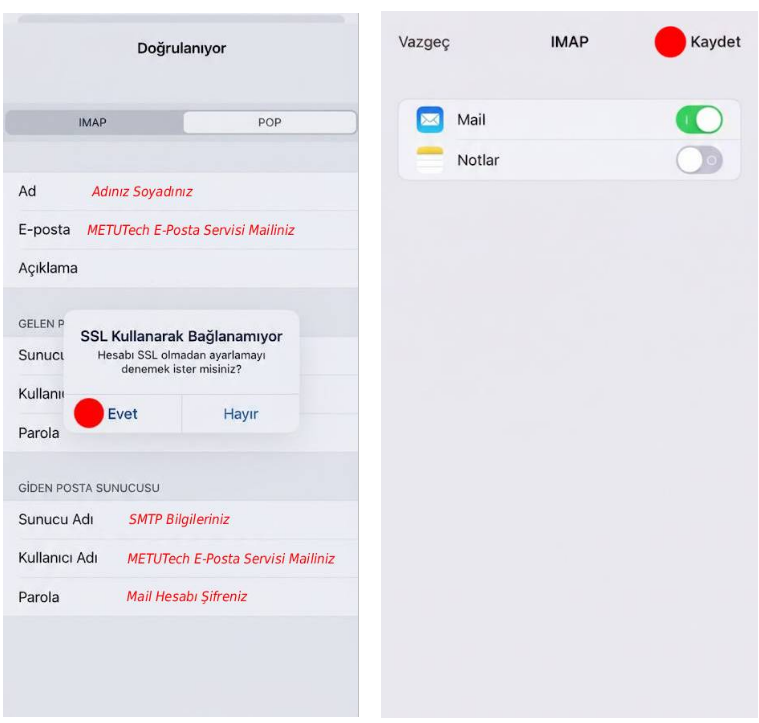
5. Tap the Save Button
After the details are verified, add the account to your device by clicking the Save or Next button at the top right.
SSL Warning and Account Check
6. SSL Warning and Setting
If your mail server does not have a custom SSL installed (this is not mandatory), the information screen below will appear in about 30 seconds (it may take shorter or longer depending on your internet connection). Tap Yes and continue.
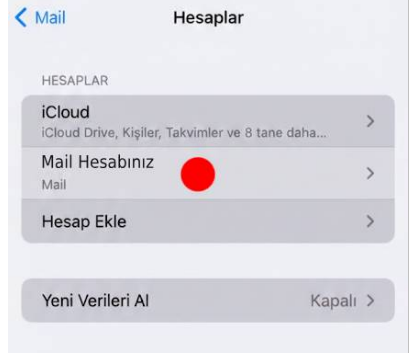
7. Checking the Added Account
When the adding process is complete, let’s return to the Accounts page, then tap the account we added on that page to go to the detailed settings page.
Checking the Port Settings
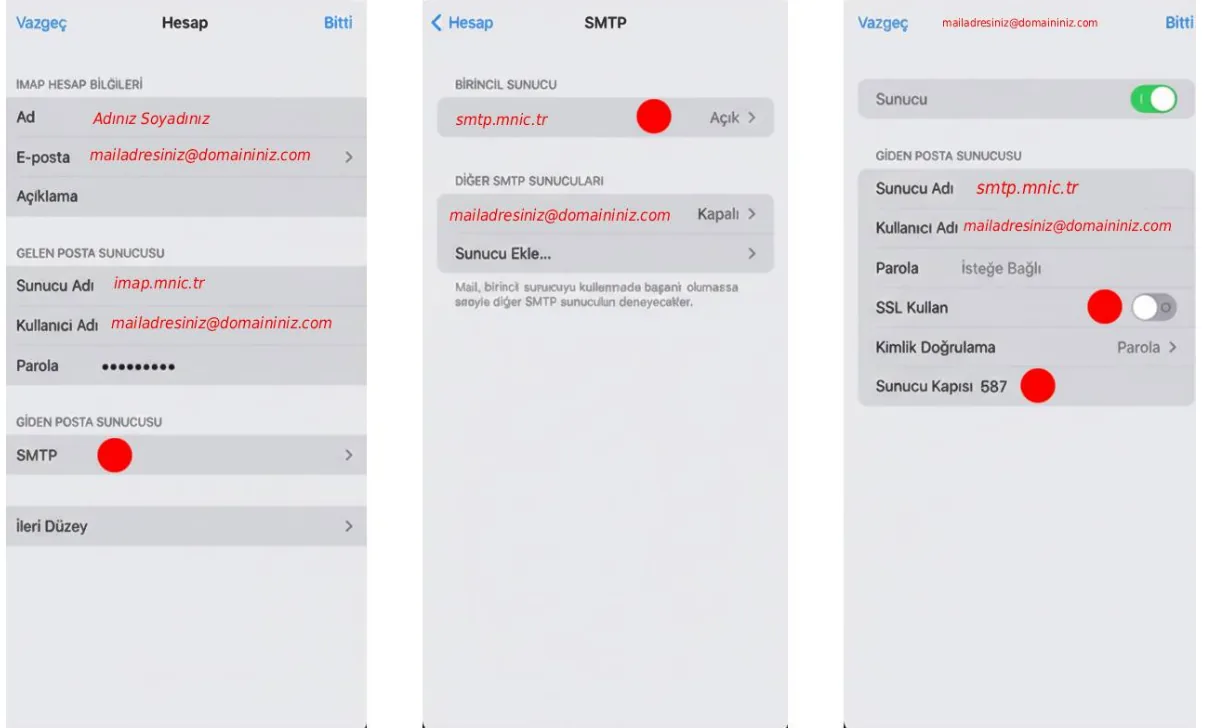
8. Advanced Settings
In some cases, if there is an error in the IMAP port settings, you may have problems receiving mail. We may therefore need to check and reconfigure the port settings.
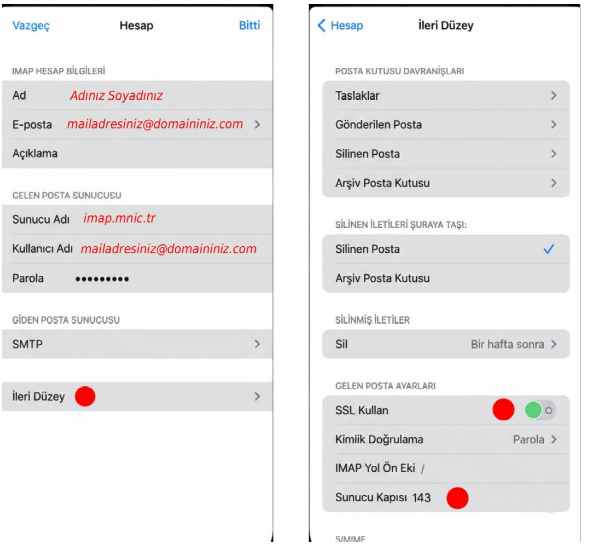
9. SMTP Settings
If there is an error in the SMTP port settings, you may have problems receiving mail. We may therefore need to check and reconfigure the port settings.
Your setup is complete. If you get an error, repeat the steps from the beginning and check that your details (your email address, password, server addresses) are correct.
Was this article helpful?
Thank you for your feedback.
Still stuck? Our support team is here to help. Tell us your question and our experts will help you.