We walk you through setting up your Business Email account in clients such as Outlook, Gmail and Thunderbird via webmail. We also share the required IMAP and SMTP server, port and connection settings.
·2 min read
Access from email programs (Outlook, Apple Mail, Gmail, etc.) via IMAP, POP and SMTP is available in the Business and higher Business Email packages; with the Free and Starter packages, you access your emails through webmail.
This document has been prepared to explain how to configure METUnic Business Email accounts for use in email clients such as Outlook, Gmail, Thunderbird and similar.
The guide covers the steps of accessing the required settings through webmail, selecting the correct platform and entering the IMAP / SMTP details in the relevant clients.
Webmail Login and Connecting a Device
1. Logging In to the Account Through Webmail
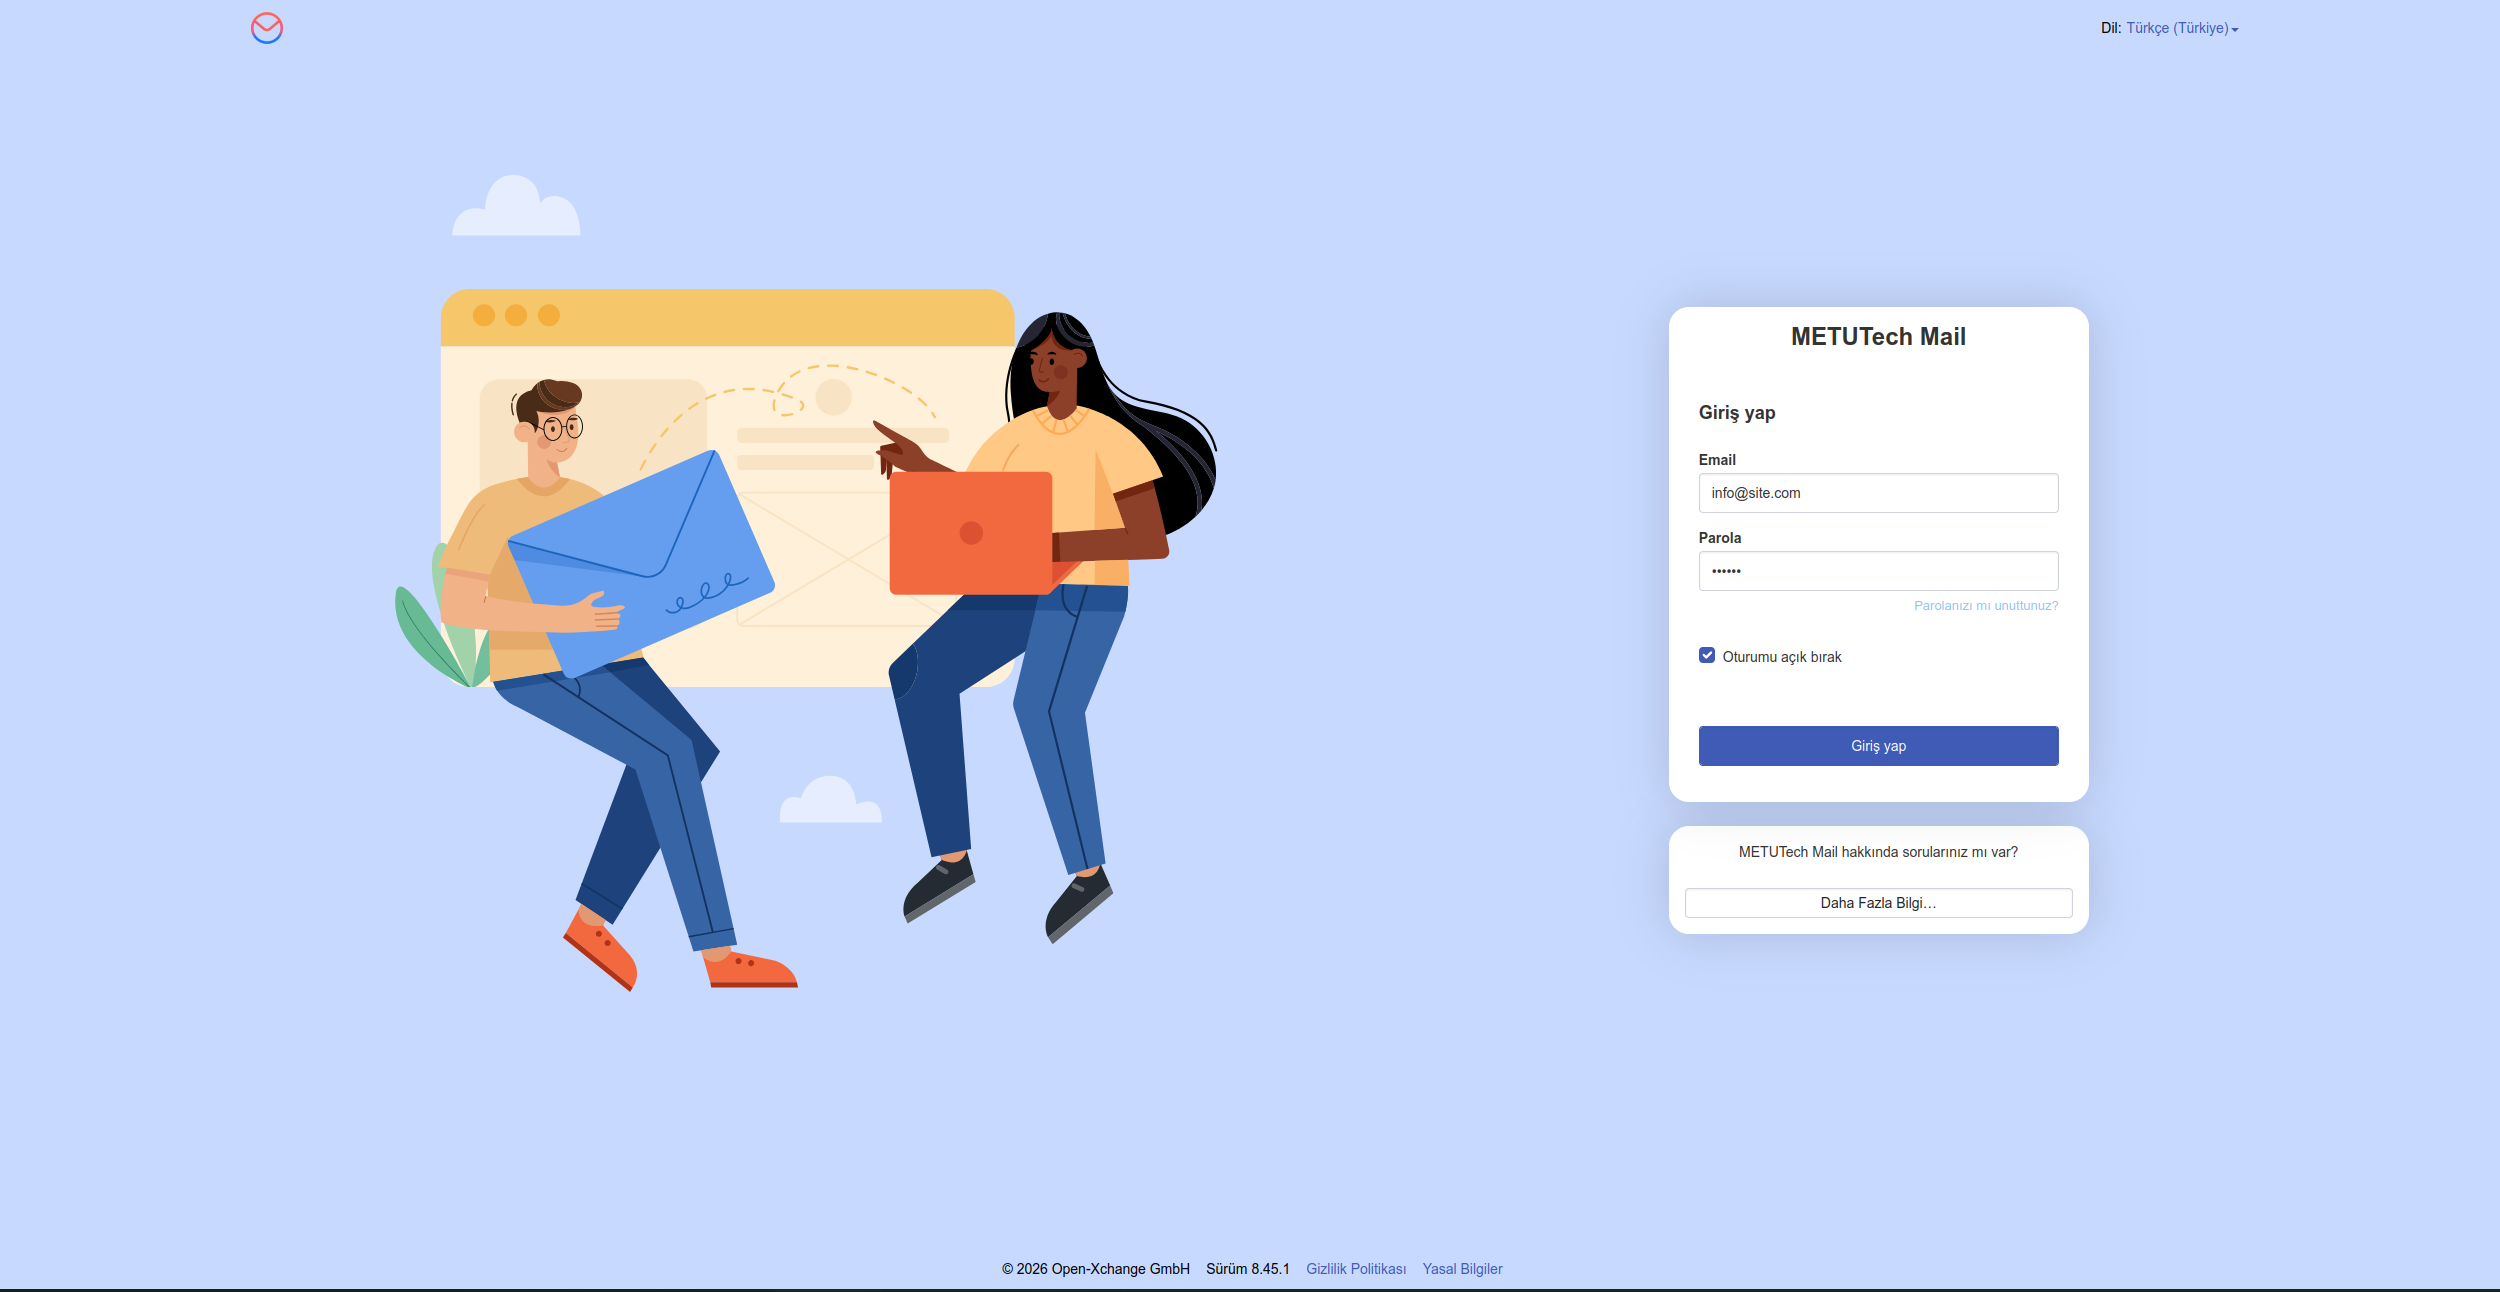
Before starting the setup, you must log in to the relevant email account through webmail.
Webmail address: https://mail.mnic.tr/appsuite/
Example username:test.user@mnic.com.tr
Once you have logged in successfully, you can move on to the steps below.
2. Accessing the Connect Device / Application Menu
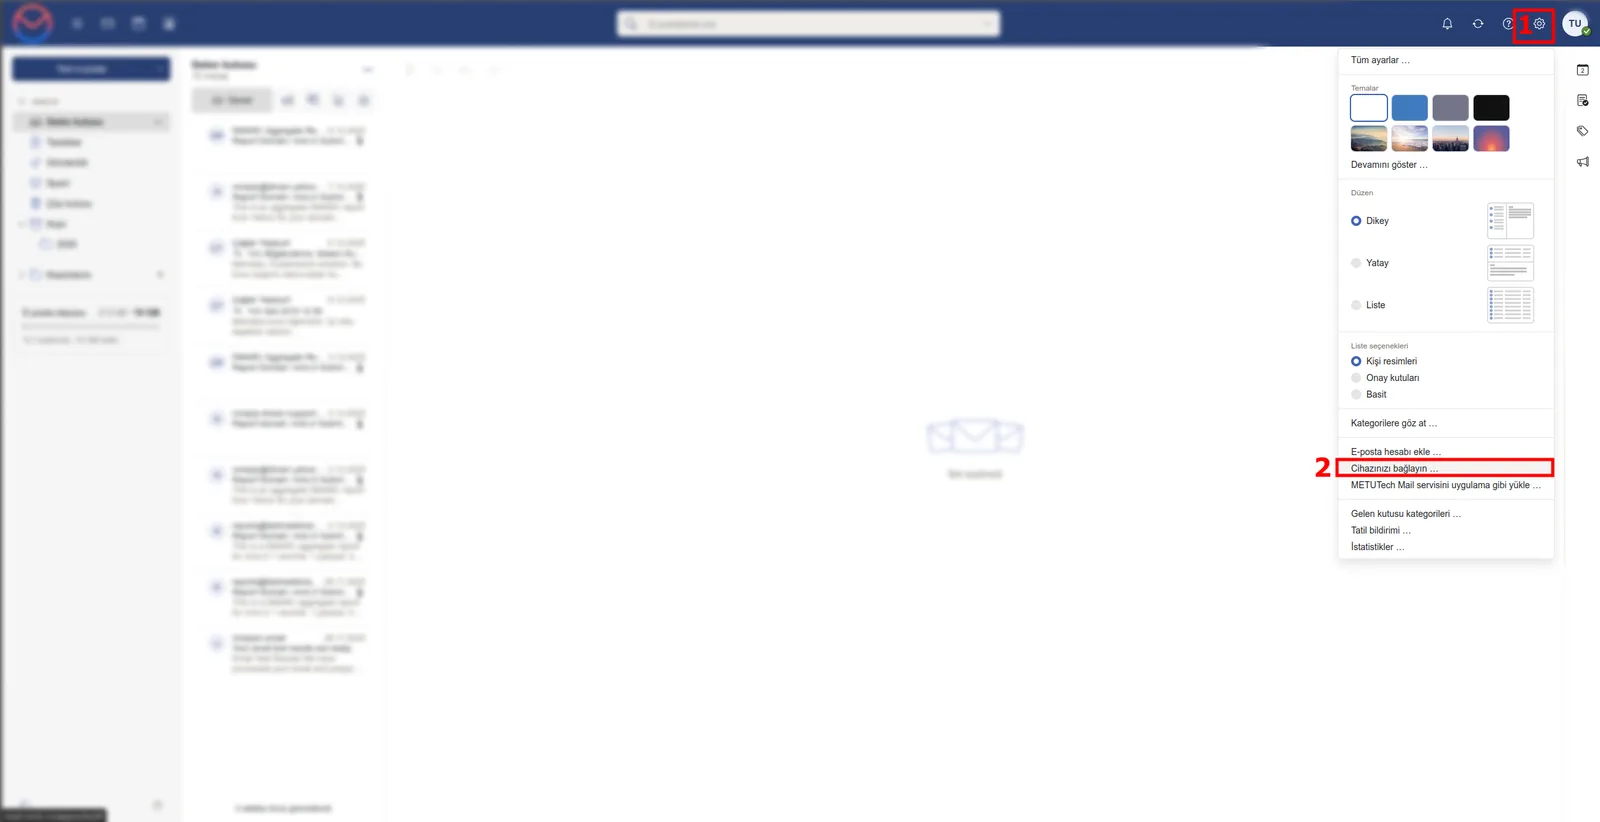
In the webmail interface, click the Settings (⚙️) icon in the top right corner.
From the menu that opens, select the “Connect your device” option.
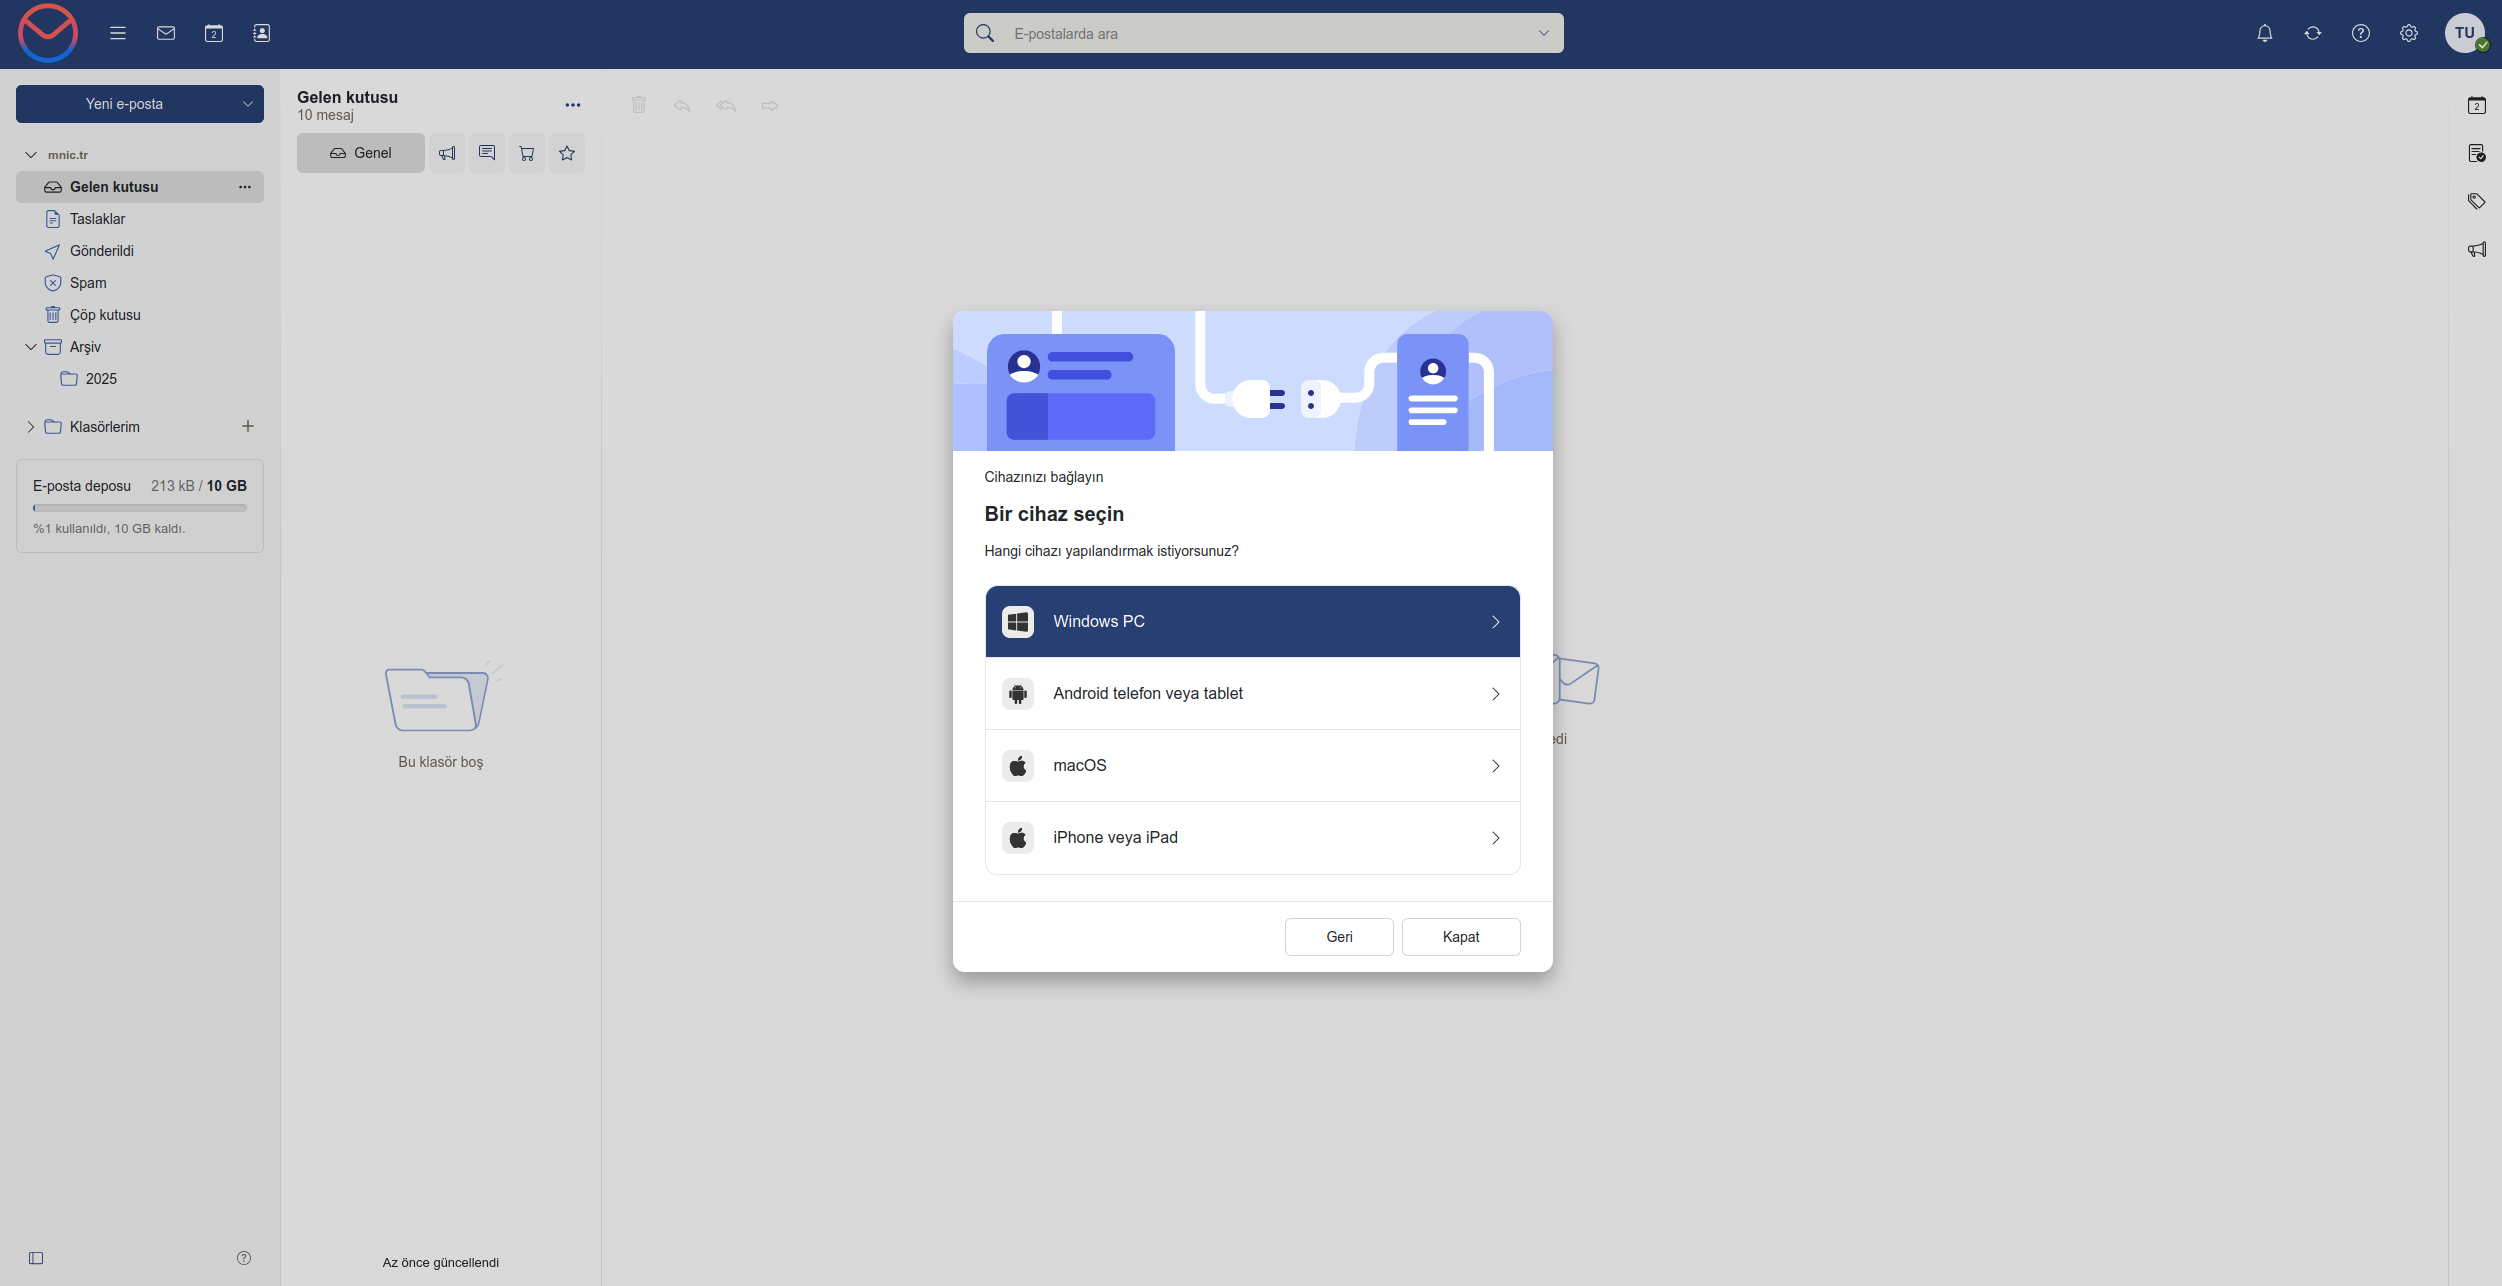
This screen allows you to configure your email account on different devices and applications. (See Image 1)
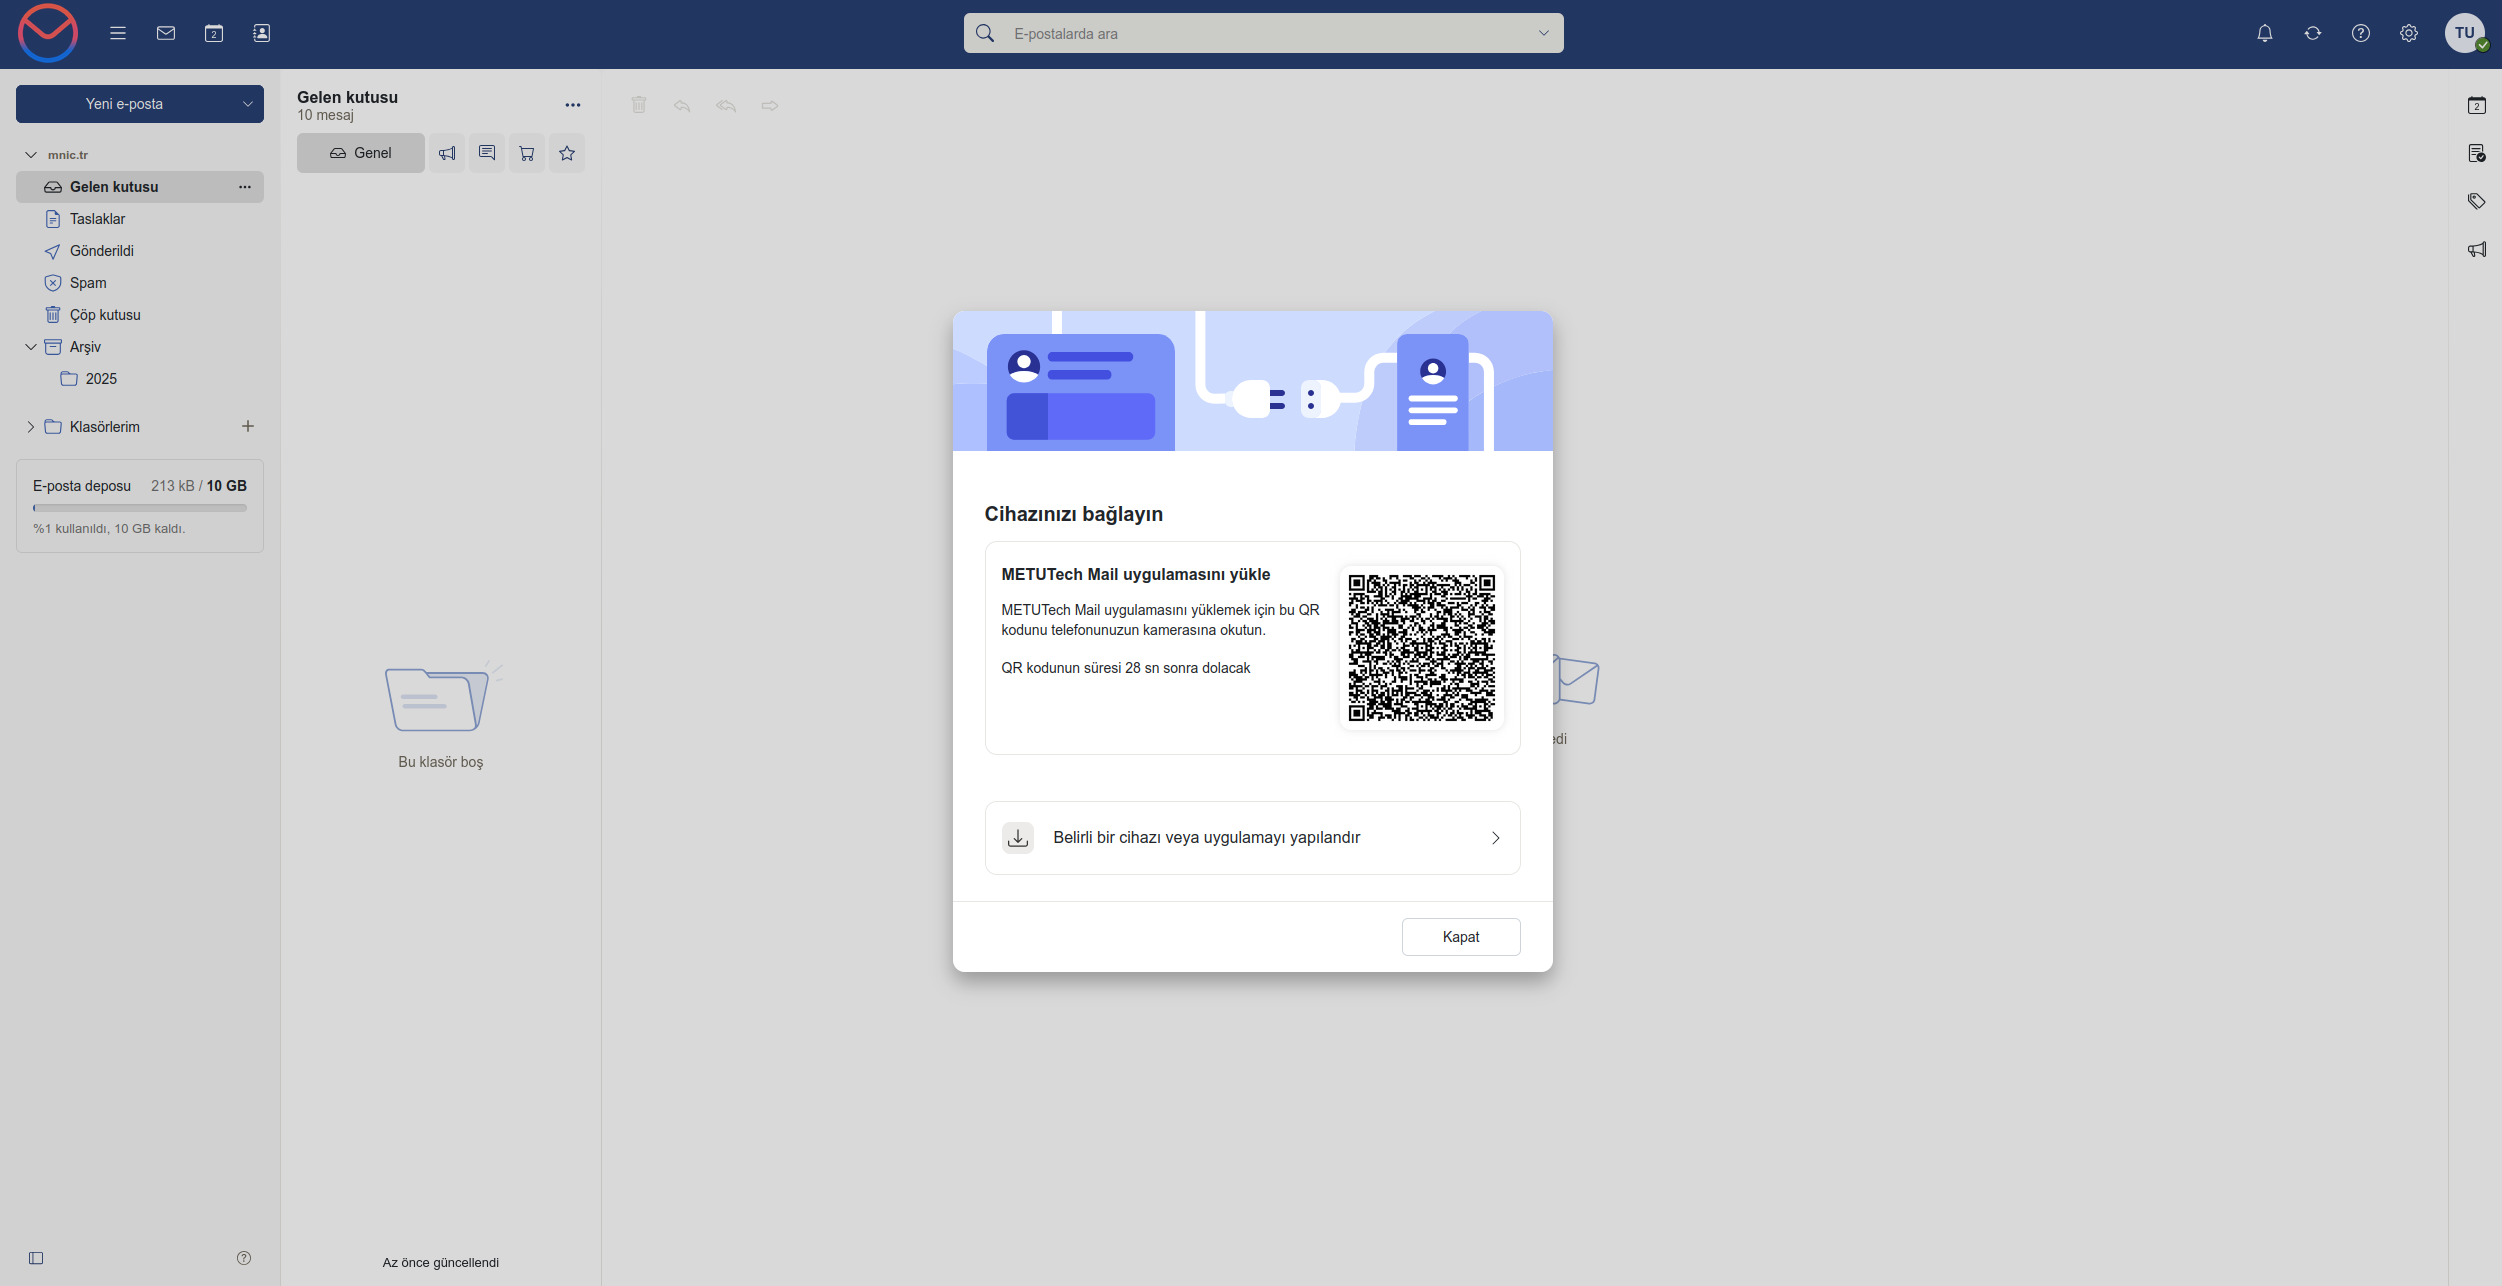
Note: The QR code on this screen is only for setting up the Business Email mobile application. No QR code is used for third-party email clients such as Outlook, Gmail or Thunderbird.
3. Configuring a Specific Device or Application
In the window that opens:
Continue by selecting the “Configure a specific device or application” option.
This step gives us access to the settings required for manual mail setup. (The QR code applies to the setup of the Business Email application.)
Choosing the Platform and Service
4. Selecting the Platform
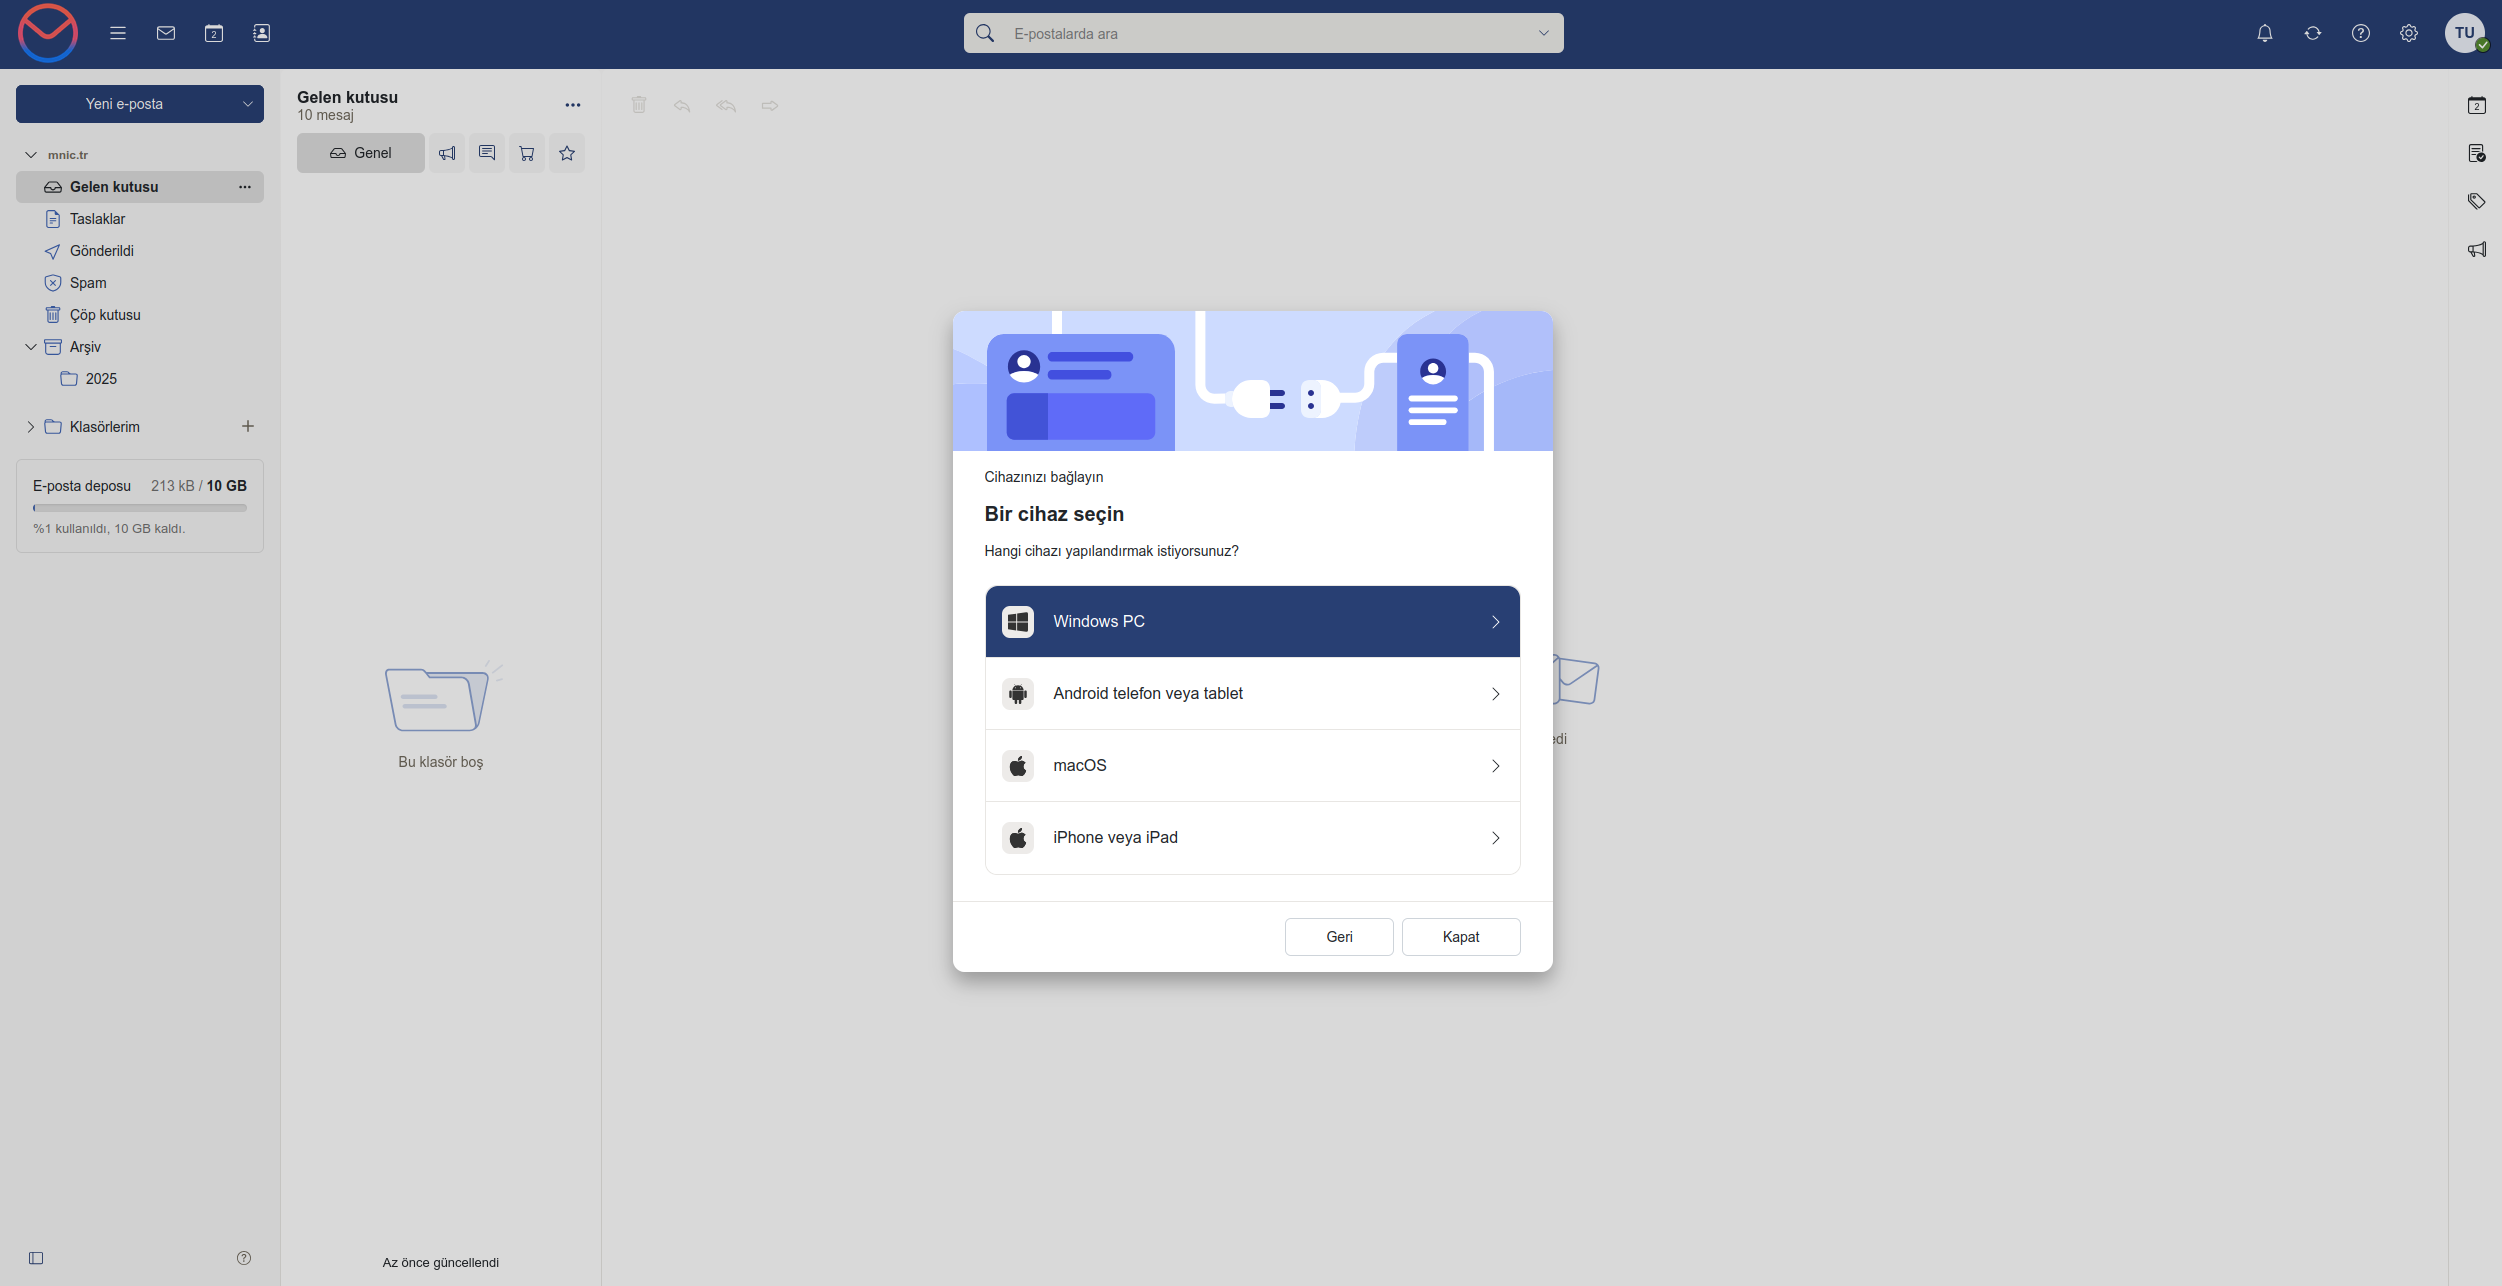
On this screen, select the device or operating system on which the setup will be done.
Available options:
Windows PC
Android phone or tablet
macOS
iPhone or iPad
Example scenario: Since the setup will be done through Outlook, continue with the Windows PC option.
5. Selecting the Service to Configure
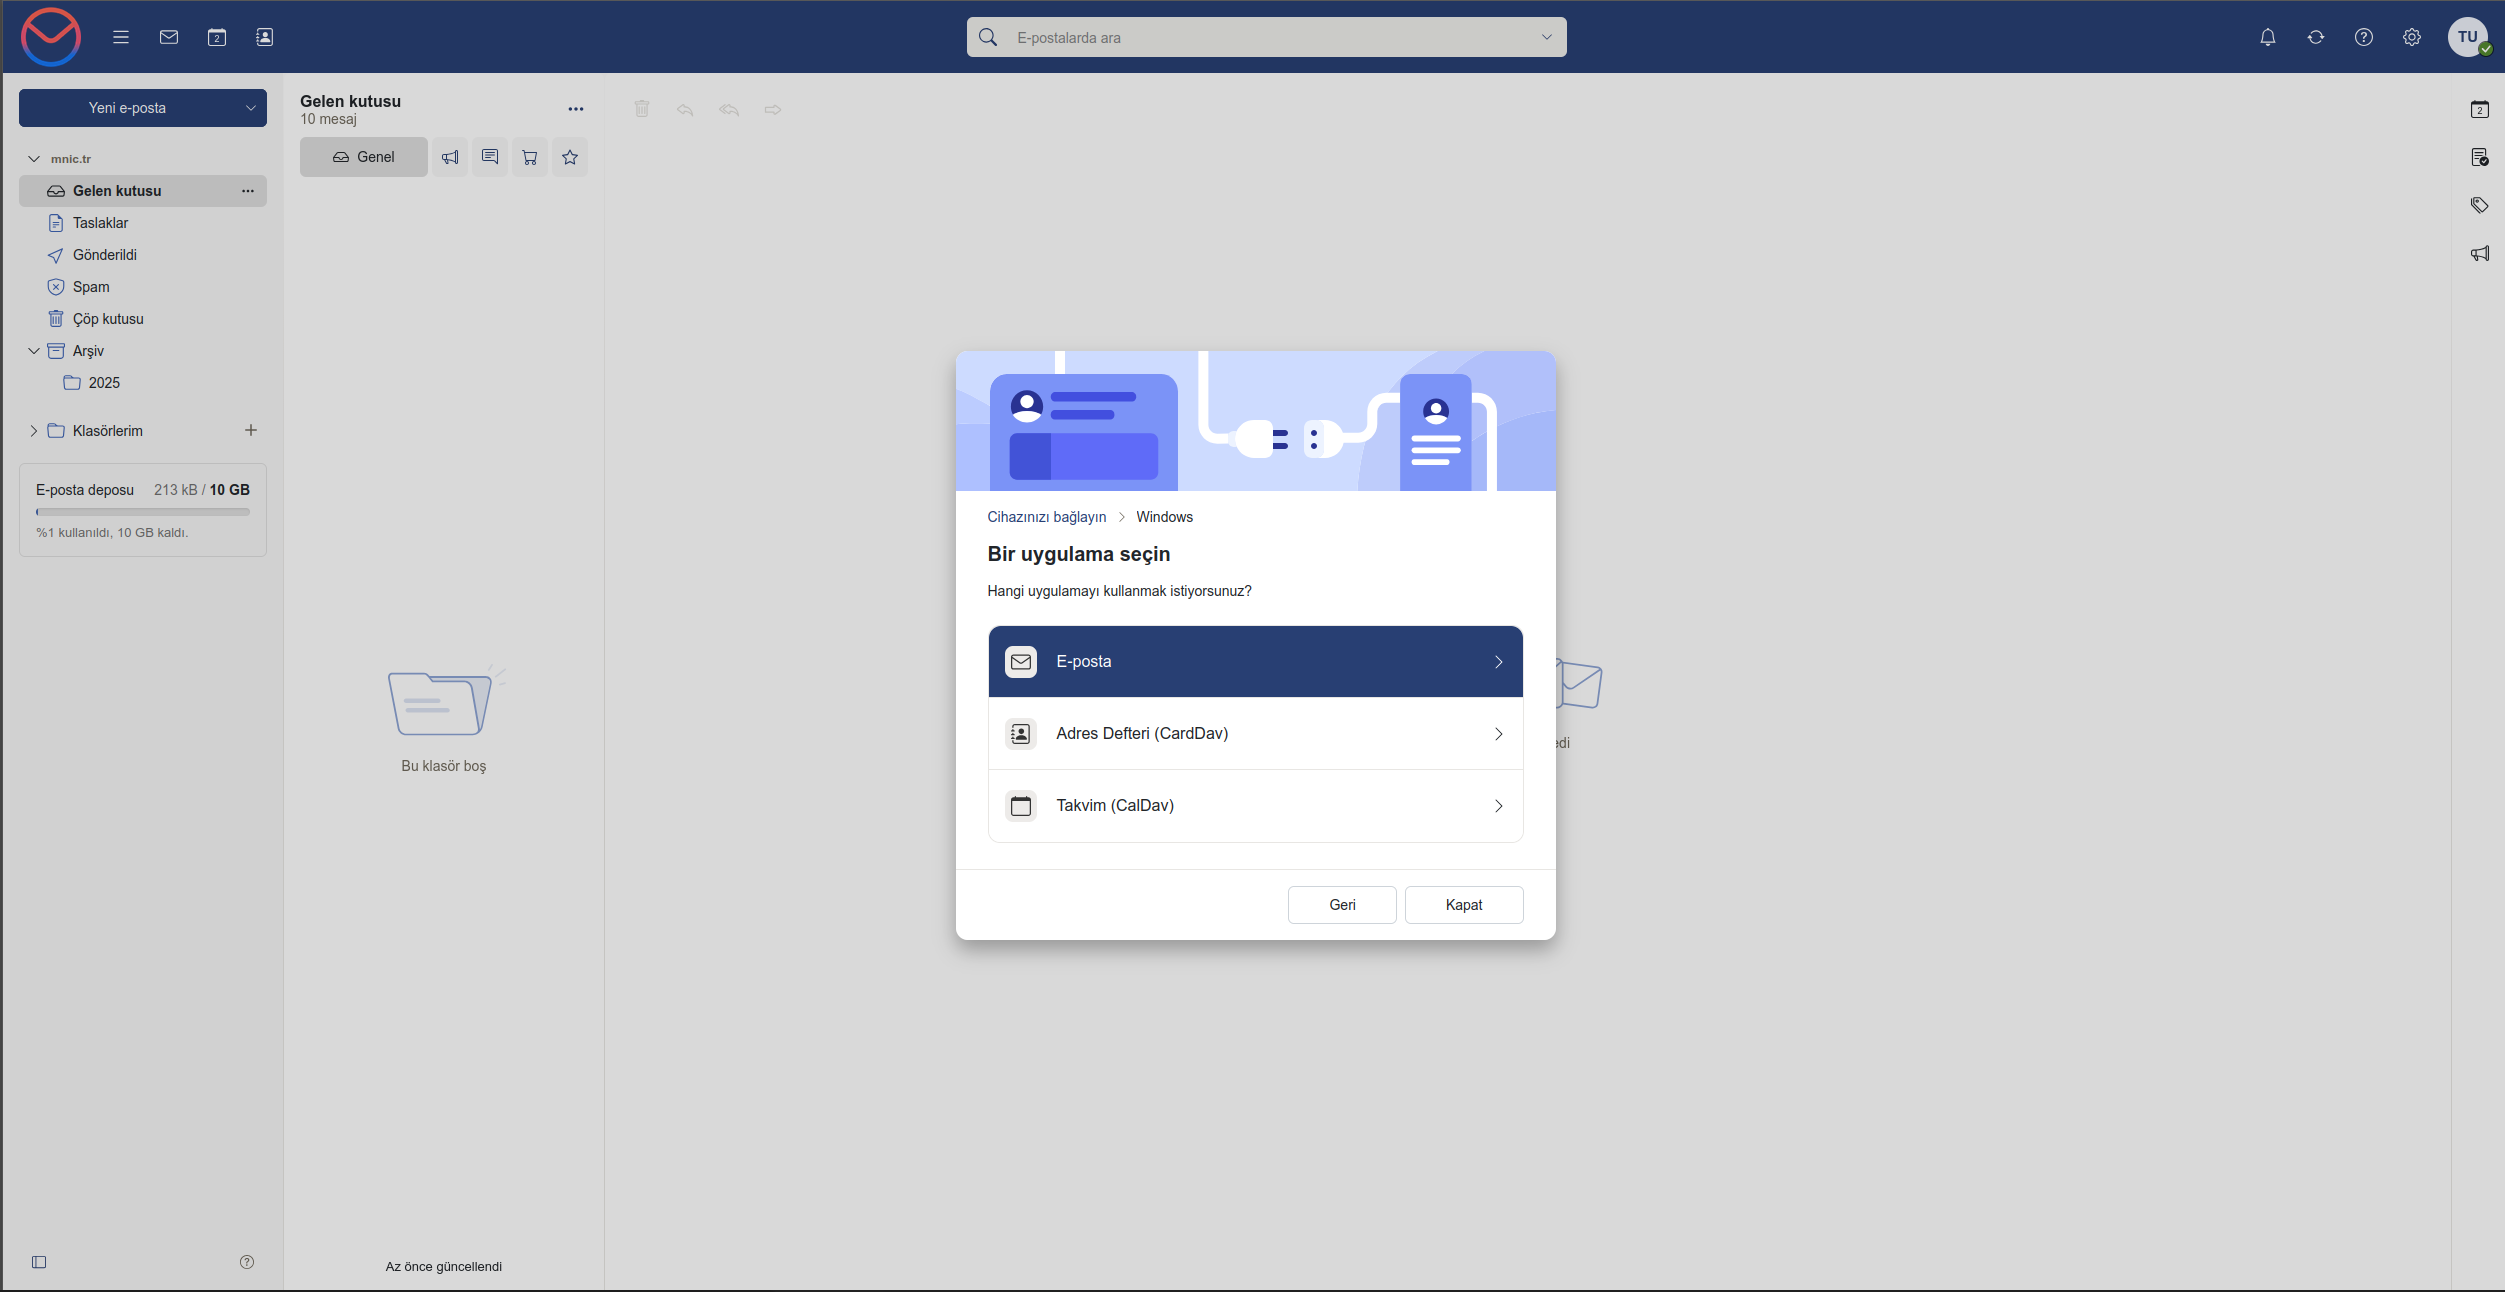
At this stage, you determine which service the setup will be done for:
Email → Mail setup (IMAP / SMTP)
Address Book (CardDAV)
Calendar (CalDAV)
For standard email clients, you should proceed by selecting the Email option.
IMAP and SMTP Server Settings
6. Viewing the IMAP and SMTP Settings
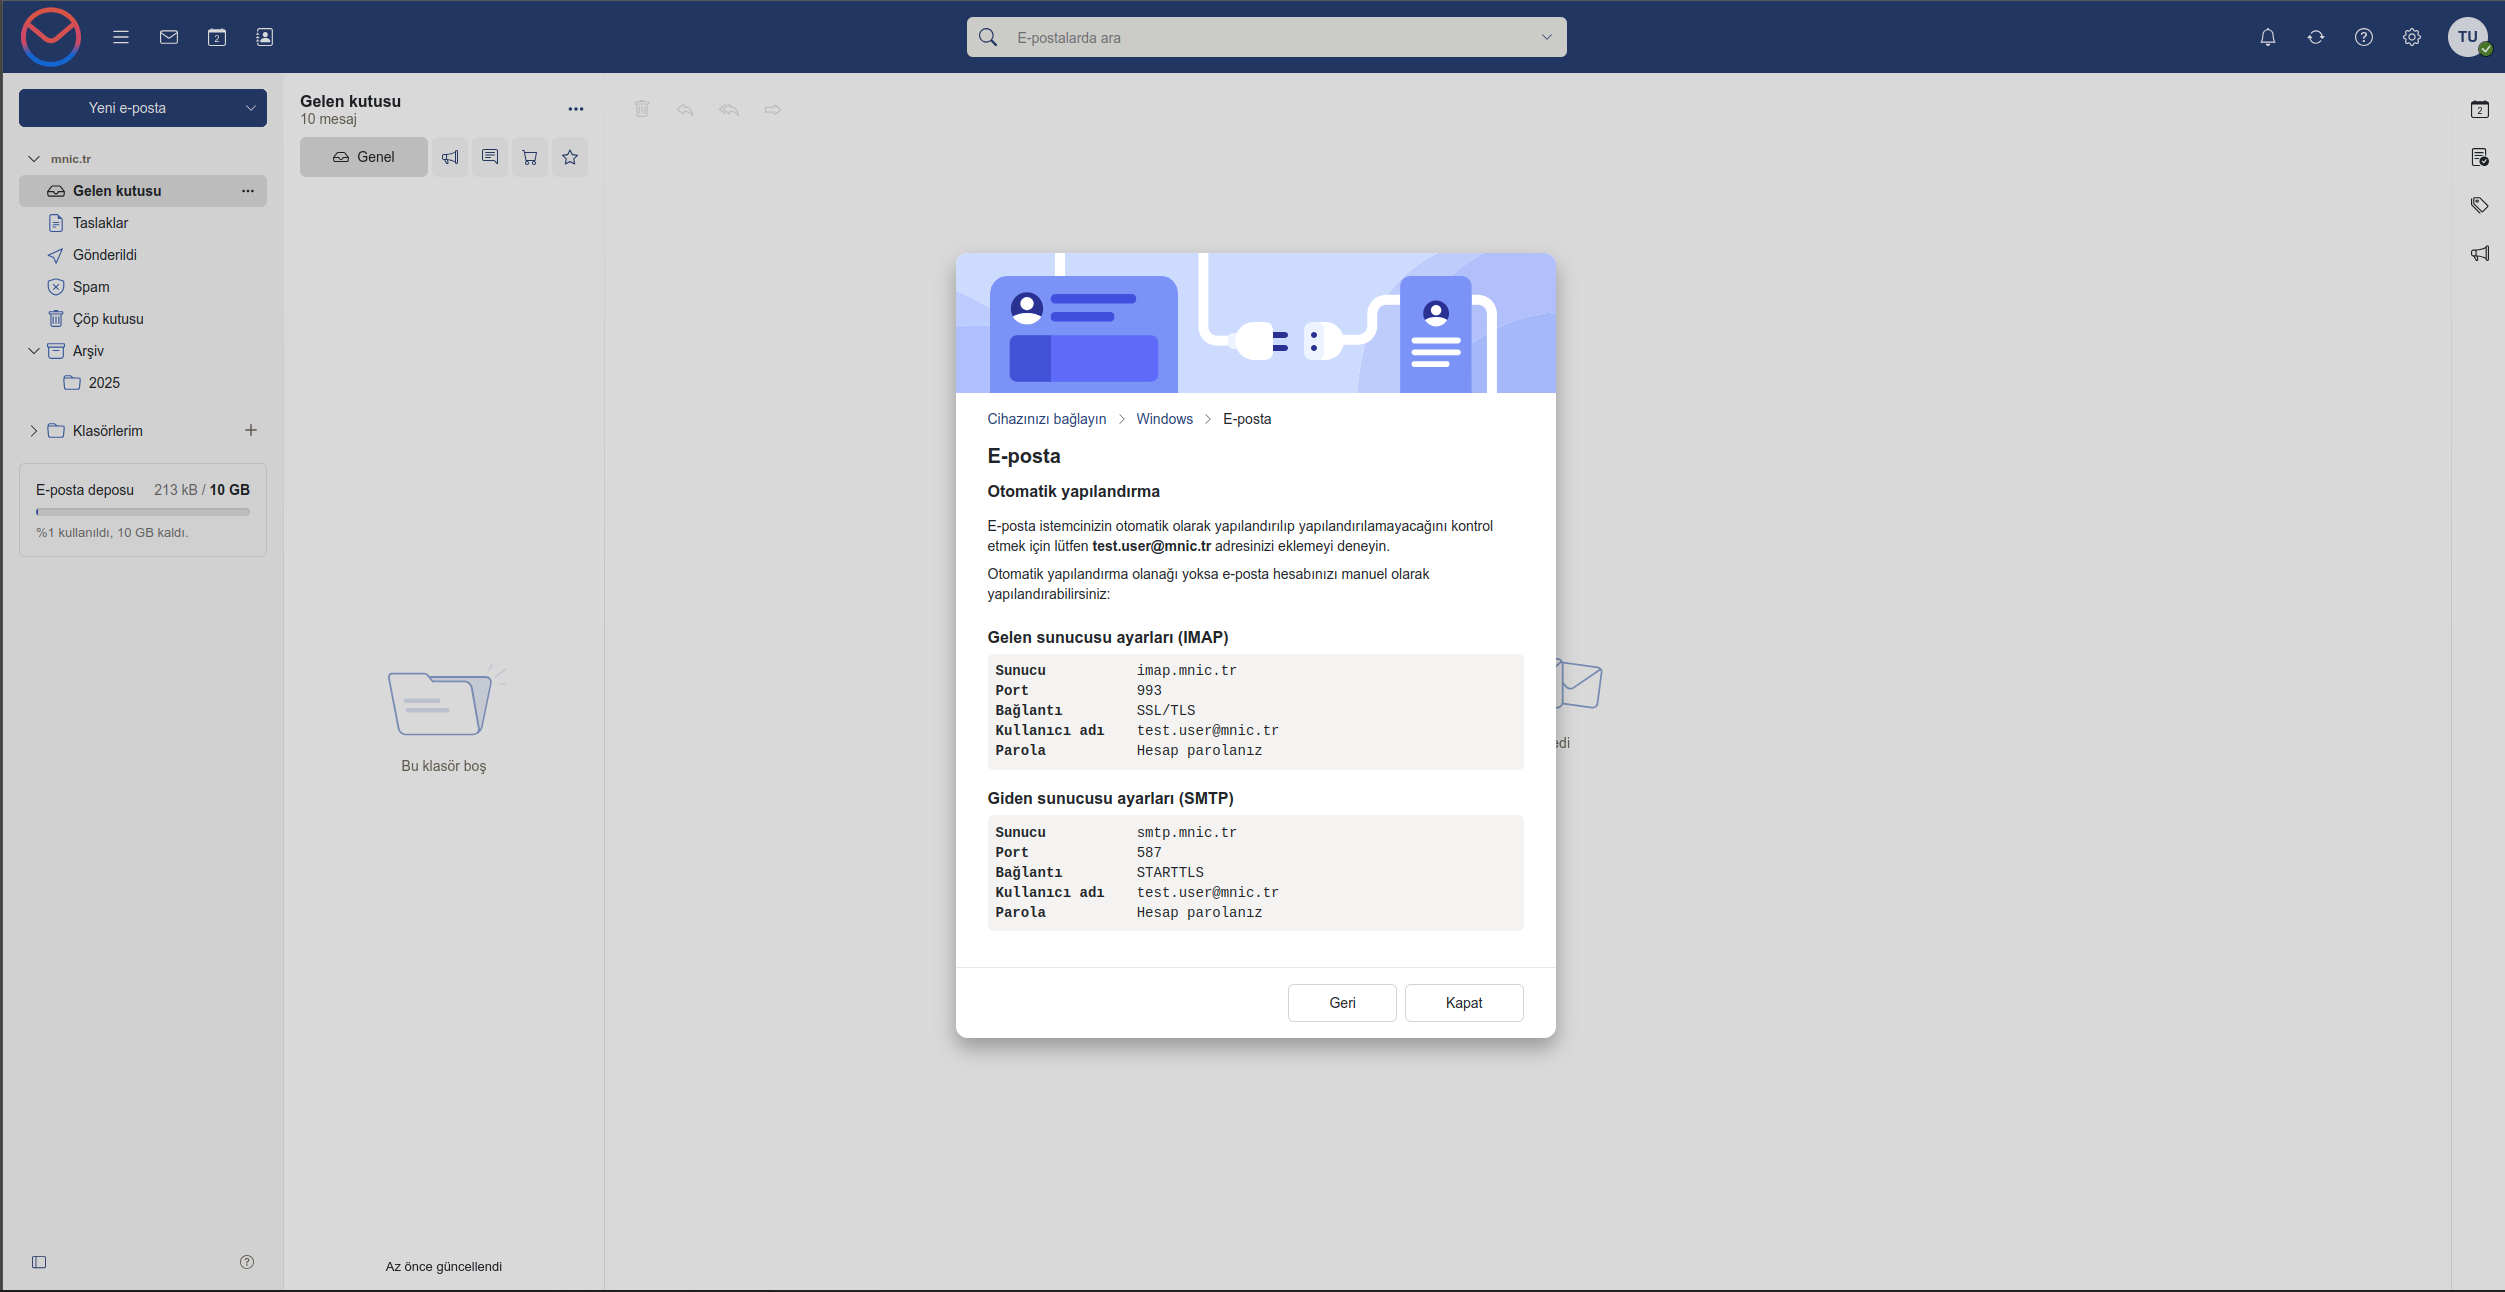
After the selections, the system automatically displays on screen the IMAP (incoming) and SMTP (outgoing) server details required for the account concerned.
This information will be used during manual setup in Outlook, Gmail, Thunderbird and similar clients.
7. Required Settings for Email Clients
The information below can be used in common across all third-party mail clients.
IMAP (Incoming Server) SettingsServer:imap.mnic.trPort:993Connection Type: SSL/TLS Username:hesapadiniz@mnic.trPassword: The password of your email account
SMTP (Outgoing Server) SettingsServer:smtp.mnic.trPort:587Connection Type: STARTTLS Username:hesapadiniz@mnic.trPassword: The password of your email account
8. Completing the Setup
Once the information above has been entered correctly, your email account will become active in the relevant mail client.
If you experience any connection or sending/receiving problem, you should carefully check:
The username format
The port and connection type
The accuracy of the password
Was this article helpful?
Thank you for your feedback.
Still stuck? Our support team is here to help. Tell us your question and our experts will help you.
We explain that Turkcell's free email service YaaniMail closes on 31 October 2026 and what this means for its users. We show step by step how to move your emails to Business Email using Audriga.
We walk you through moving messages from your Yandex email accounts to Business Email using Audriga. We also explain creating an app password, enabling IMAP and running a delta migration for the latest emails.
We walk you through adding your Business Email account to the Outlook app on iPhone and iPad using IMAP. We also show the IMAP and SMTP server settings you need and how to find them in your webmail settings.