After successfully purchasing the email service for your domain name, you need to complete a few simple setup steps so that you can use your service fully. In this post, we explain step by step how to set up your email service through the METUnic panel.
Email Setup Guide
1. Go to the Setup Page
First, after logging in to your METUnic control panel, go to the "Services → Mail Service" section in the top menu. Here, find your domain name that has an active email service and click the "Set Up" button on its right.

DNS Records and Webmail Login
2. Add the DNS Records
On the screen that opens, the DNS records (MX, SPF, CNAME, etc.) required for the service to work properly are listed. You need to enter these records in the control panel of the hosting or DNS provider that manages your domain name.
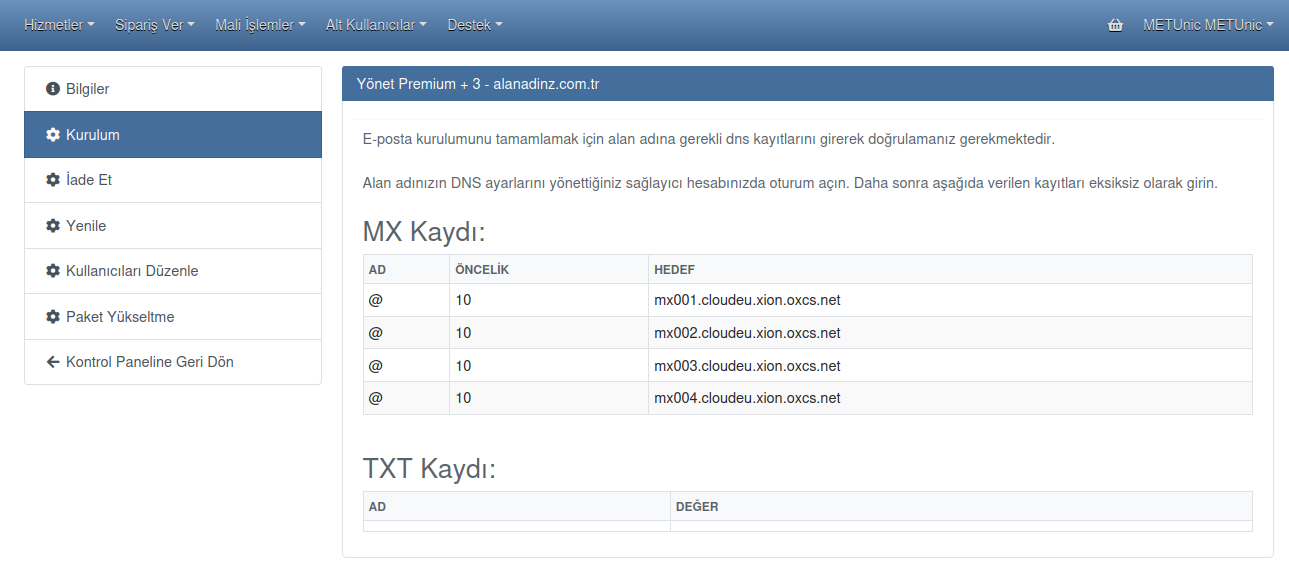
Note: Depending on your provider, it may take from a few minutes to a few hours for the DNS records to take effect.
3. Log In to Your Webmail Account
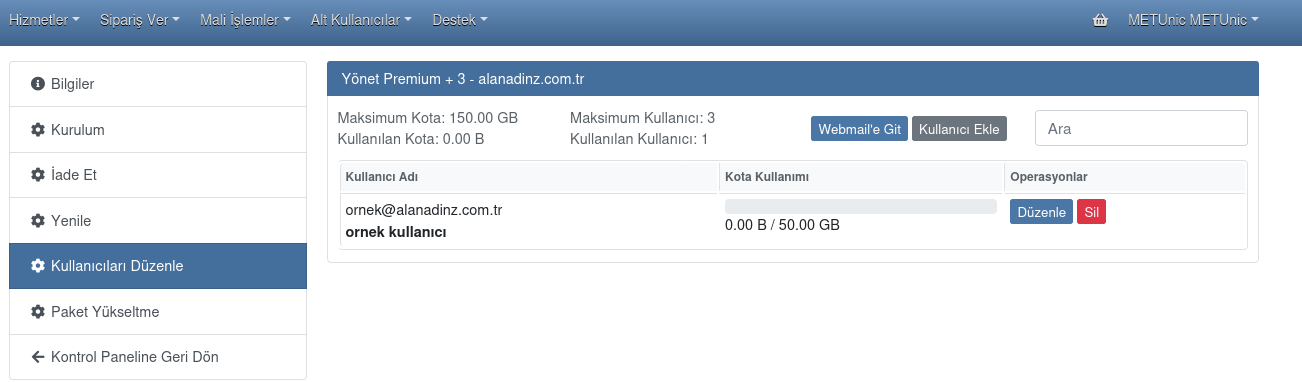
Once your DNS records have been updated correctly, switch to the "Edit Users" tab from the same menu of your control panel.

By clicking the "Go to Webmail" button on the screen that opens, you can access your email account and easily manage your incoming and outgoing emails.
Questions and Service Advantages
Frequently Asked Questions
Where can I add the DNS records?
You can add the relevant records by accessing the DNS settings section in the control panel of your domain name registrar or hosting provider.
What is the webmail interface?
Webmail is the interface that lets you access your mailbox through a browser. Once the setup is complete, it can be accessed through the panel.
Advantages of the Business Email Service
- A secure email address specific to your domain name
- Advanced spam and virus filtering
- Simultaneous use across devices
- An appearance that strengthens your corporate image
Was this article helpful?
Thank you for your feedback.
Still stuck? Our support team is here to help. Tell us your question and our experts will help you.